Web Toolbar by Wibiya Free Time Frolics: April 2012

Thursday, April 26, 2012

And the Winner is......


Thank you to all those how participated in my 100 followers giveaway.  I wish I could choose several of you but alas we have just one. 
And the Winner is.....

#68 Tisha Clapp
She left a comment stating she would love a TJMaxx card. 

I have sent you an email.  Please respond within 24 hours so I can get your goodies sent.


Didn't win this time?  Come back and visit often.  I will be having some super fun posts and my blogaversary is coming up {May 20th}.  I am planning a super fun week of guest posts and another fun giveaway.  Stay tuned for more to come.

Thank you again for all those who participated and shared your love.


Sunday, April 22, 2012

Crap room to Craft room: Part 3 {File Cabinet to Iron table}


Have you seen my giveaway.  There is still time to enter.  Go here.
 Now onto my new Iron table.

Slowly but surely my Crap Room is evolving into my new craft room.  It seems like I just don't have the time to get things done. The kids have been out of school and we have been visiting family. But now its back on the horse and get things done time.  Spring break is over {can I get a Hallelujah} and Spring is just around the corner. 
So to the craft room.  Did you see the previous posts here and here. For this post I have changed my file cabinet into an ironing. All the storage space for my books to reference and the top for ironing my sewing projects.  Here is the before situation of my cutting table and the file cabinet.

Before
I cleaned off my table for the picture.  But its usually covered with fabric and patterns.

More space on my cutting table and a nice clean spot for ironing. 
Here is how I did it.

1.  I got a piece of random fabric that was large enough for my space.
This green corduroy was perfect.
2. Layer was a few pieces of foam I had leftover from another project. I had to piece them together
 and cut them the right size.
3. Layer of batting  to cover the foam.
4. I used the therm-sulate that they use for hot pads to help the heat to stay off the wood.
5. Last layer of  plain fabric. I made a little sandwich of sorts and pinned them all together.

Sew around the edge of sandwich

Cut off excess fabric

Here is my padded sandwich. Nice, soft and Heat resistant.

Next I made a fitted sheet of sorts to put around the pad and file cabinet.
I started with a piece of fabric that was 3 inches larger than the top of the file cabinet.
I rounded my corners and serged for a nice clean edge.
Fold over 1 inch to make a casing.   Stitch around folded edged leaving a small opening for your elastic.
Thread elastic through and fit to the top of your cabinet.
Next I tied mine off and that's it!The perfect fit for my cabinet.  The elastic goes right under the lip and stays down. 
I love my new place to iron ands the added space to my cutting table.And when I need the top of my file cabinet for something my cover and pad just pop off for storage.
Linking up to:
How to nest for less
DelectableHomeTip Junkie handmade projectsfive days five ways  feature friday free for all52 MantelsVisit thecsiproject.com

Thursday, April 19, 2012

Leibster Award & A Giveaway

First order of business

Meredith from Haute to Sew picked my blog to receive the Liebster Award.  I am so honored.   I had not heard of the Liebster Award until then.  So here is a little background.

Liebster Award

 Liebster is German for ‘dearest’ or ‘beloved’-- but it can also mean ‘favorite’. The Liebster award was created to give some attention to those blogs with less than 200 followers.

So when I found out that I won the Liebster Award from Meredith I was super excited. You should check out her blog.  Its super cute and filled with lots of tips and tricks and projects.  Defiantly in my blog reader.
In accepting the award, you are supposed to follow these rules:
1. Show your thanks to the blogger who gave you the award by linking back to them.
2. Reveal your five picks for the award and let them know.
3. Post the award on your blog.
4. Bask in the love from the most supportive people on the blogshare-other bloggers.
5. Finally and the best rule of all………have fun and spread the love!


And now here are my 5 faves that follow the guidelines for the award so you can check these lovelies out in no particular order:

1. Baking with Blondie
2. Tish-Delectable Home I picked her before she hit her 200 followers.  I am so glad she reached that milestone. Congrats!
3. Michelle- Jones Party of 5
4.  Those Crafty Sisters
5. Kendal1- Every Day Giggles


And to celebrate my Liebster award and reaching 100 followers I would love to do a giveaway.So here's how it goes.

Washi Tape is all the rage so for this giveaway I am going to spread a little Washi Love.  1 lucky follower is going to win a Free Time Fun prize package.


It includes: * Washi Tape from my stash that  I would love to share with you. 
*Project starters to go with your Washi Tape.
*A few random lovelies from PYP. I am kind of a PYP hoarder.  I always buy a little extra so I am going to share the love. 
*And last but not least, your choice of $25 gift card.  You can choose from TJ Maxx, Joanns, Michaels or Target. 
Over $50.00 in prizes mailed right to your house. 

So there it is.  A little {Love} From Me.  Thanks for supporting me and my little blog.  I {Heart} you all.
 
Answer the questions and do what they ask.  The giveaway is open from April 19th- April 26th. Next week I will draw the winner.  Easy peasy! I hope you win the contest!

Monday, April 16, 2012

Guest Post at My Sister's Suitcase

Hey Ladies this one is for you.  It's Girls Just Wanna have fun week over at My Sister's Suitcase.  While they are away at SNAP! some of us gals are going to play in there blog.  Head on over for some fun post from Me and a few other fun gals! They are doing a fun giveaway at the end of the week.  My Knobby Necklace will be in the Girls Just Wanna have Fun Basket of Goodies.
Head over and check it out.

mysisterssuitcase.blogspot.com

Sunday, April 15, 2012

Rug Slip Cover Makeover

 Since moving into our new home I have been slacking when it comes to decorating.  Pregnancy and a new baby really take its toll.  But finally I am feeling good enough to do something. 
I finally got the "get my house decorated bug." 
I have this new, larger home than the last.  Which means money.  I have limited funds to fancy up my casa.  But I am determined to do this on a budget. 
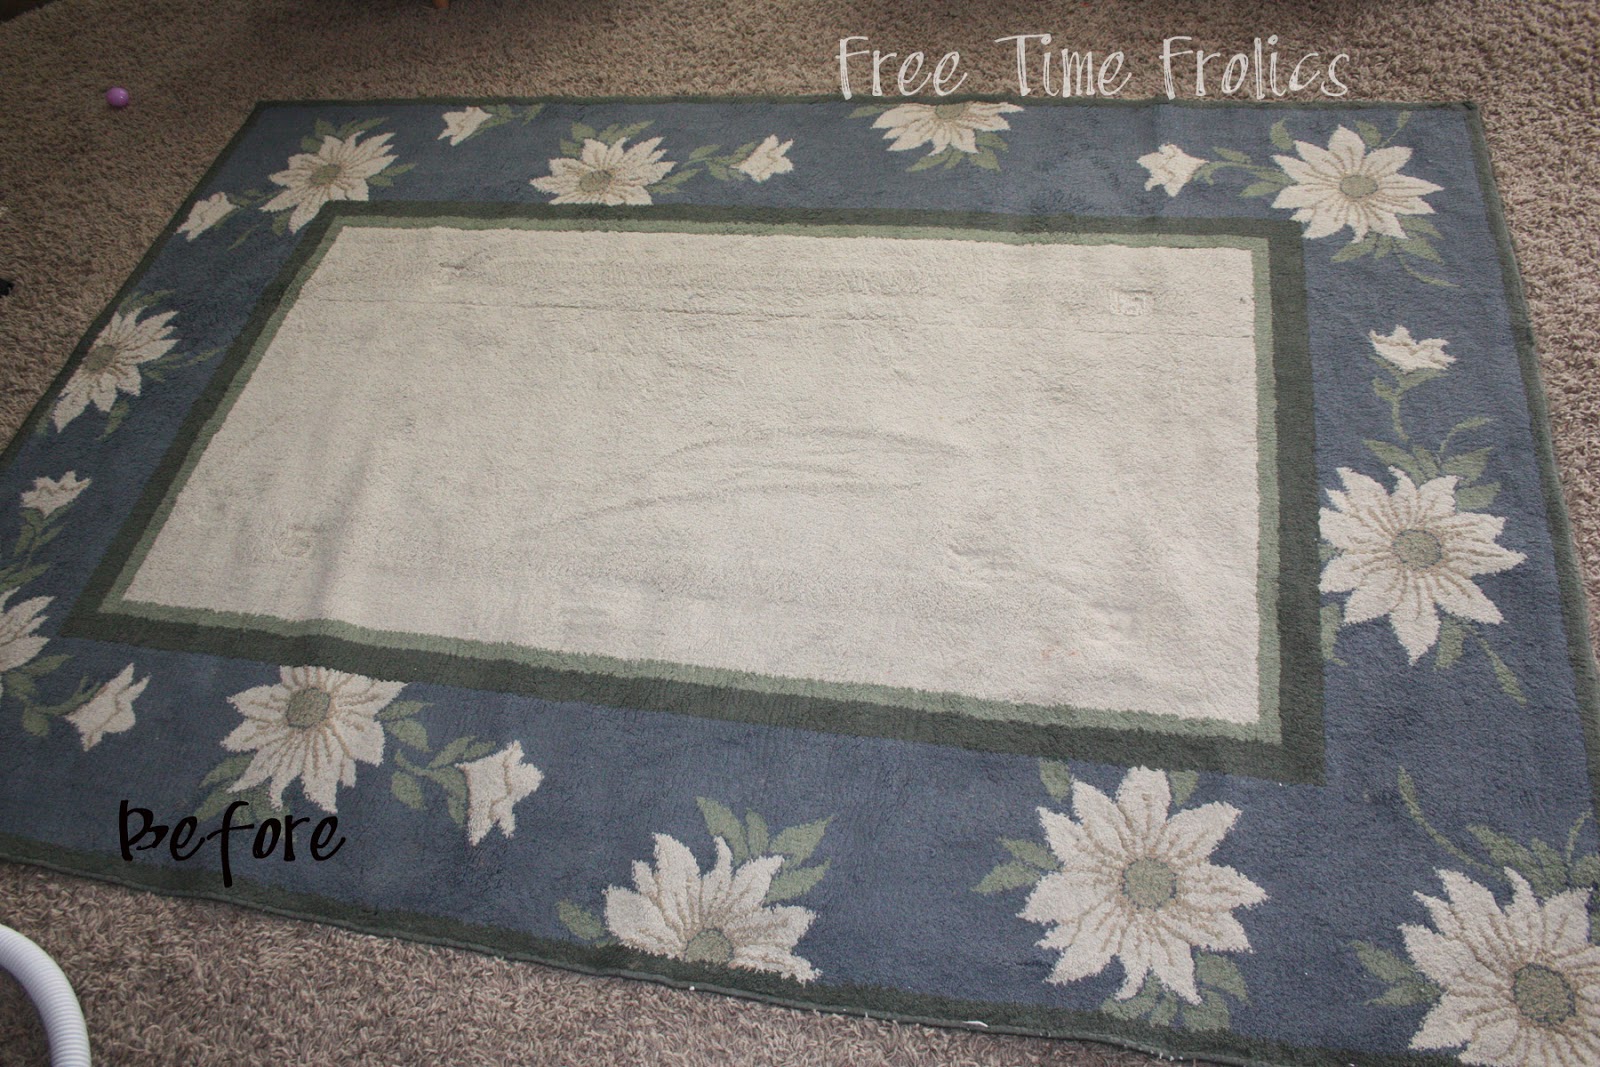
From our old home I have this rug. It is still in fair condition.  But the style is not mine anymore. I have been looking for the right rug.  But I just haven't found what I want.  Or can not afford what I want. Then I had an idea.
Just did a little DIY rug recovering. 
My thought was to make it like a duvet cover.  It just slips on and off. 

So I searched through fabric I already had. (I buy fabric on a whim if I love it.  It is a terrible habit. I have quite the collection of fabrics in my craftroom.)  And found one I thought would work.


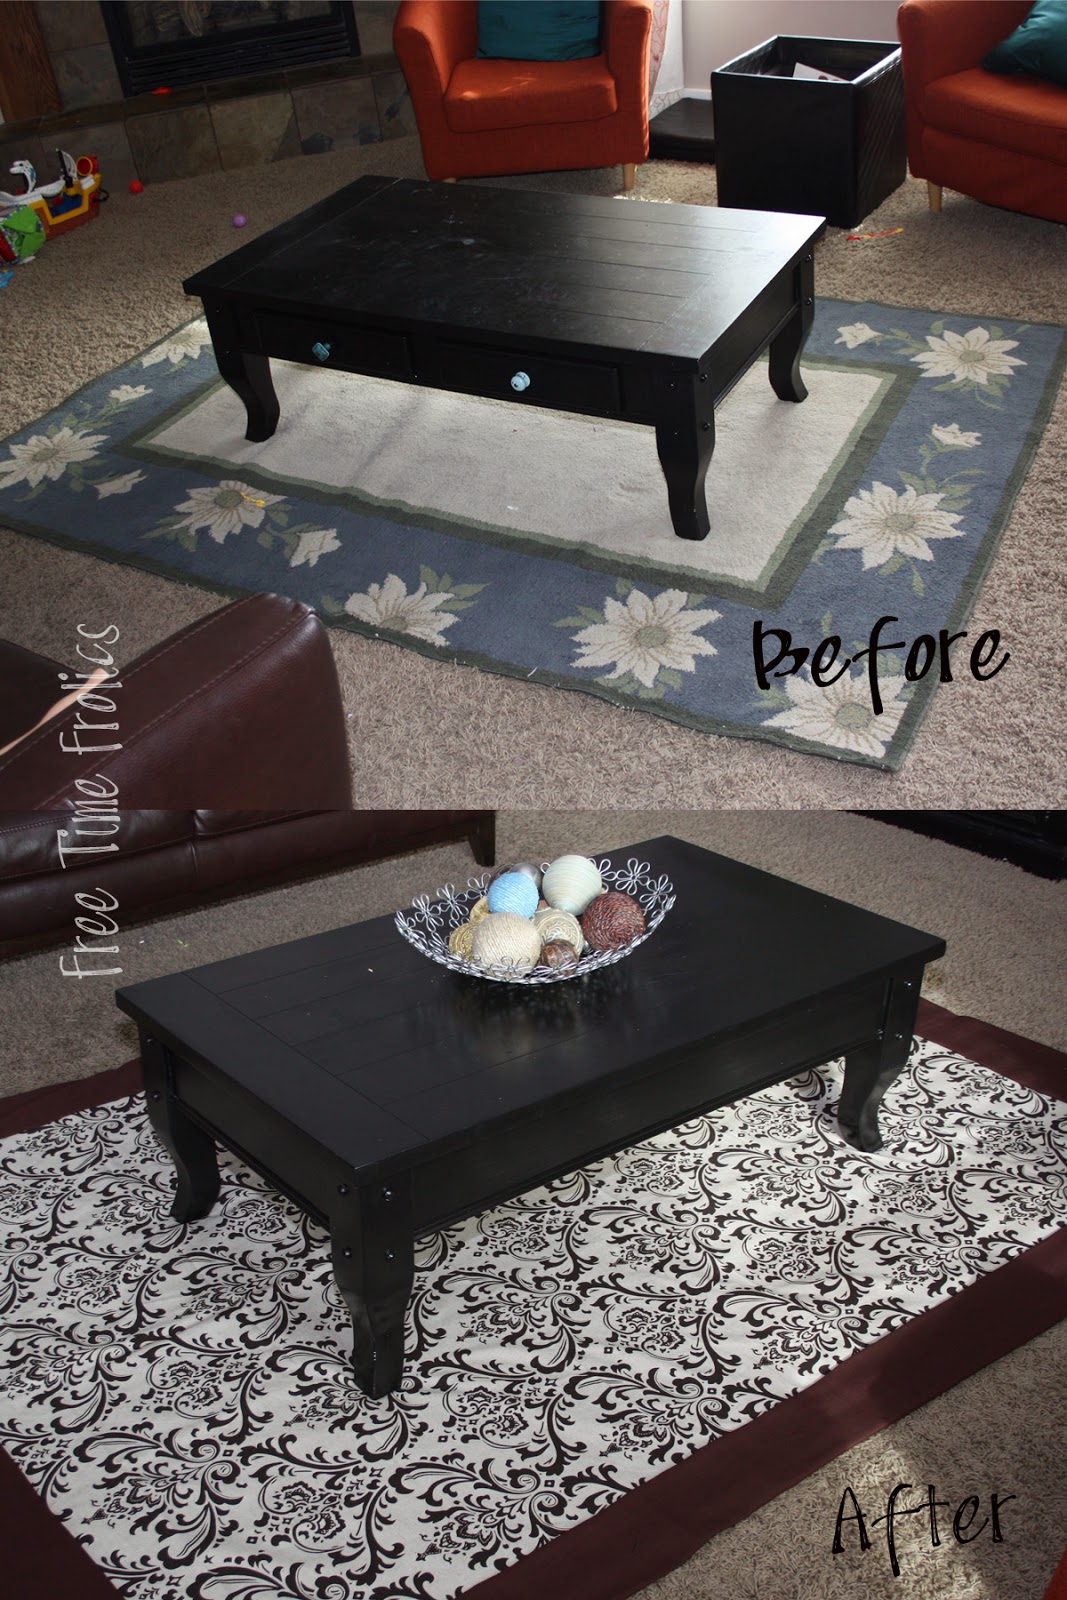
So here are the before and afters.


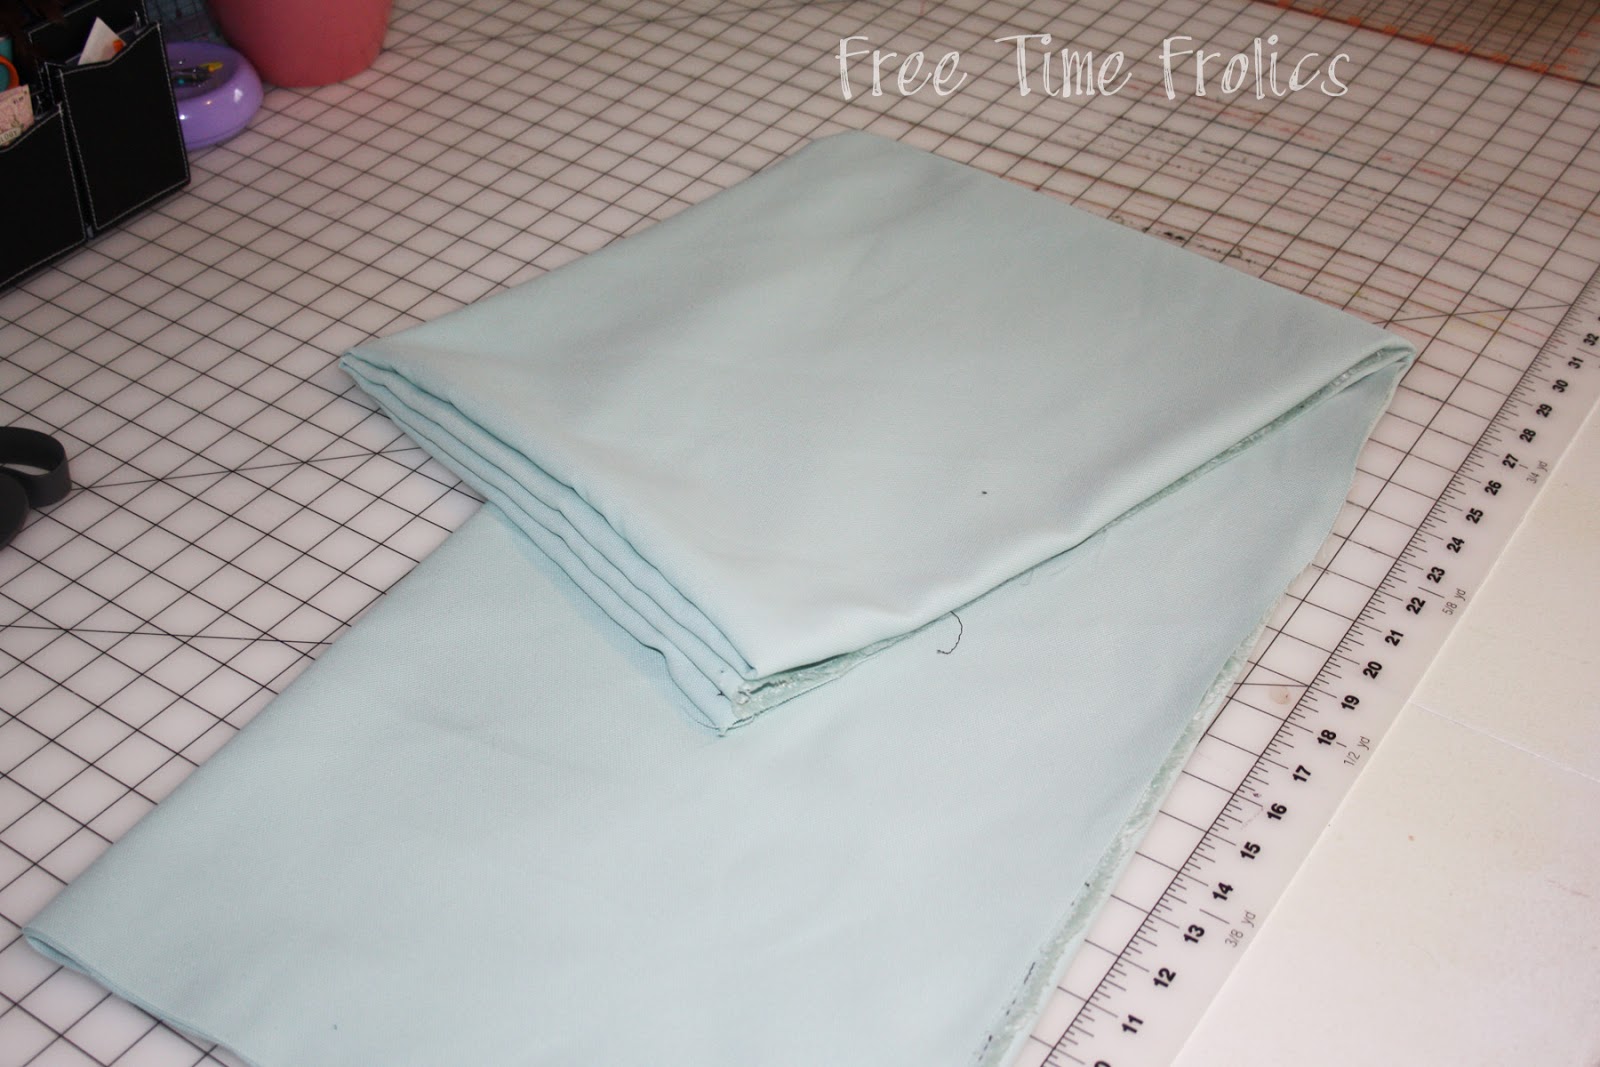
See that adorable blue and green with sun flowers.
It needs a little pick me up.

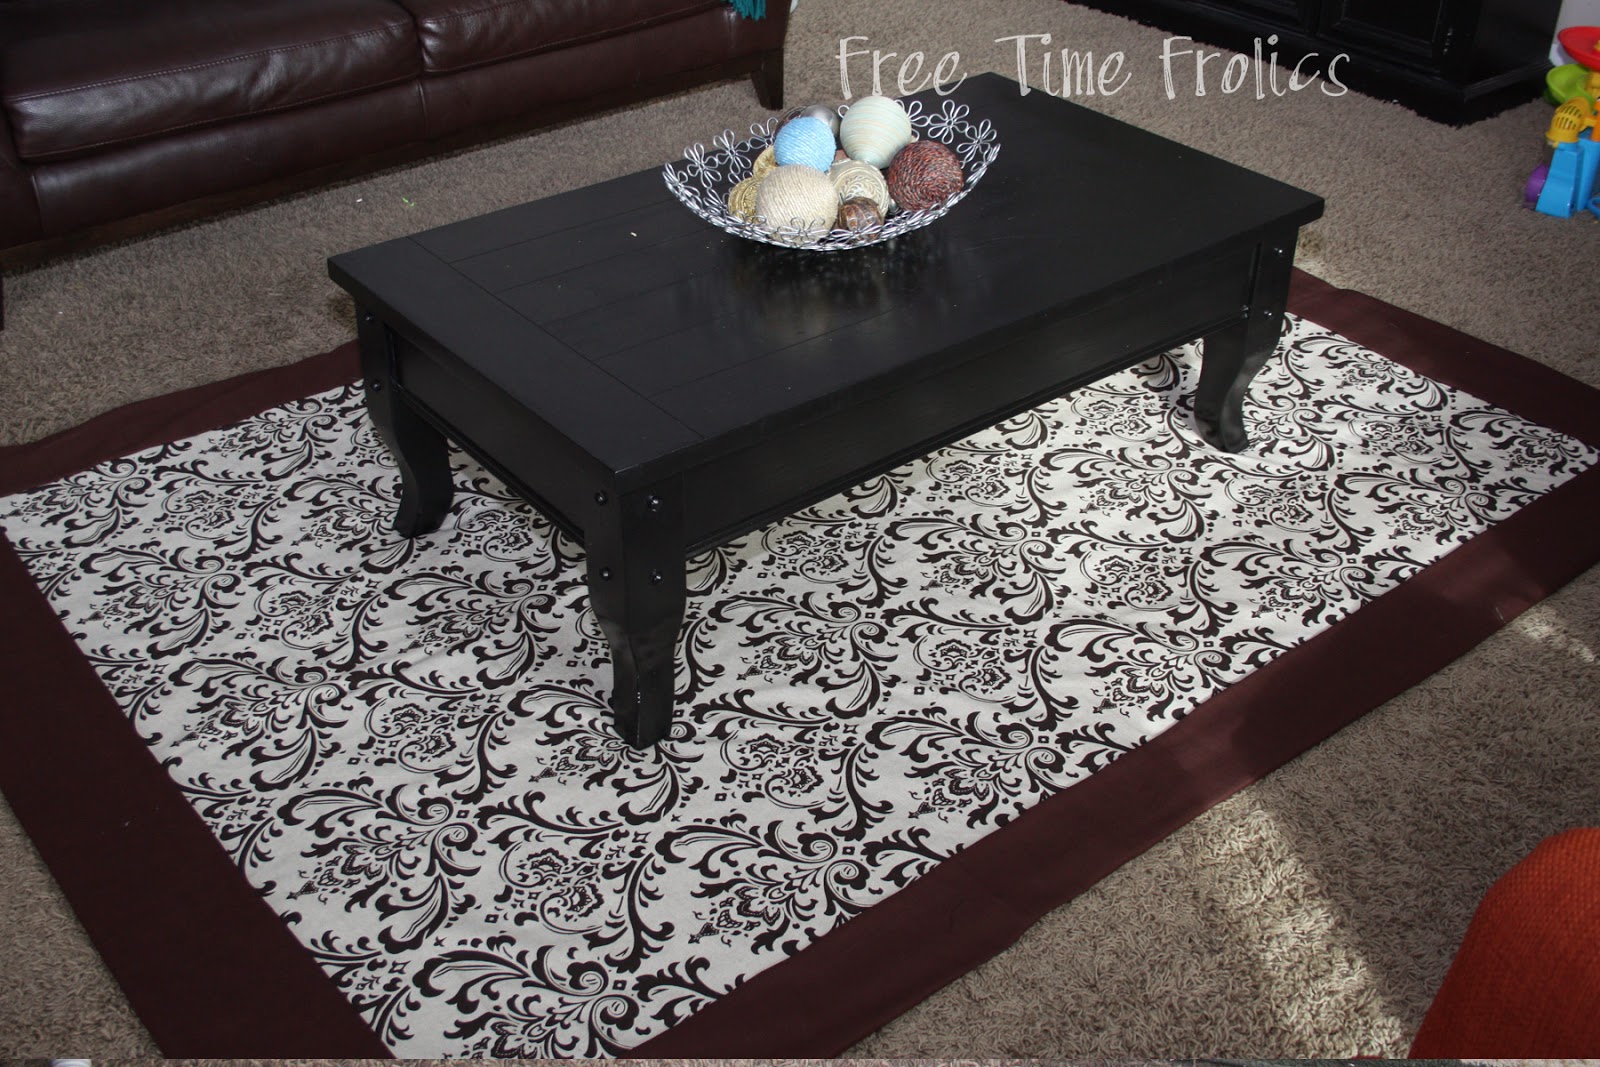
And here is the after.


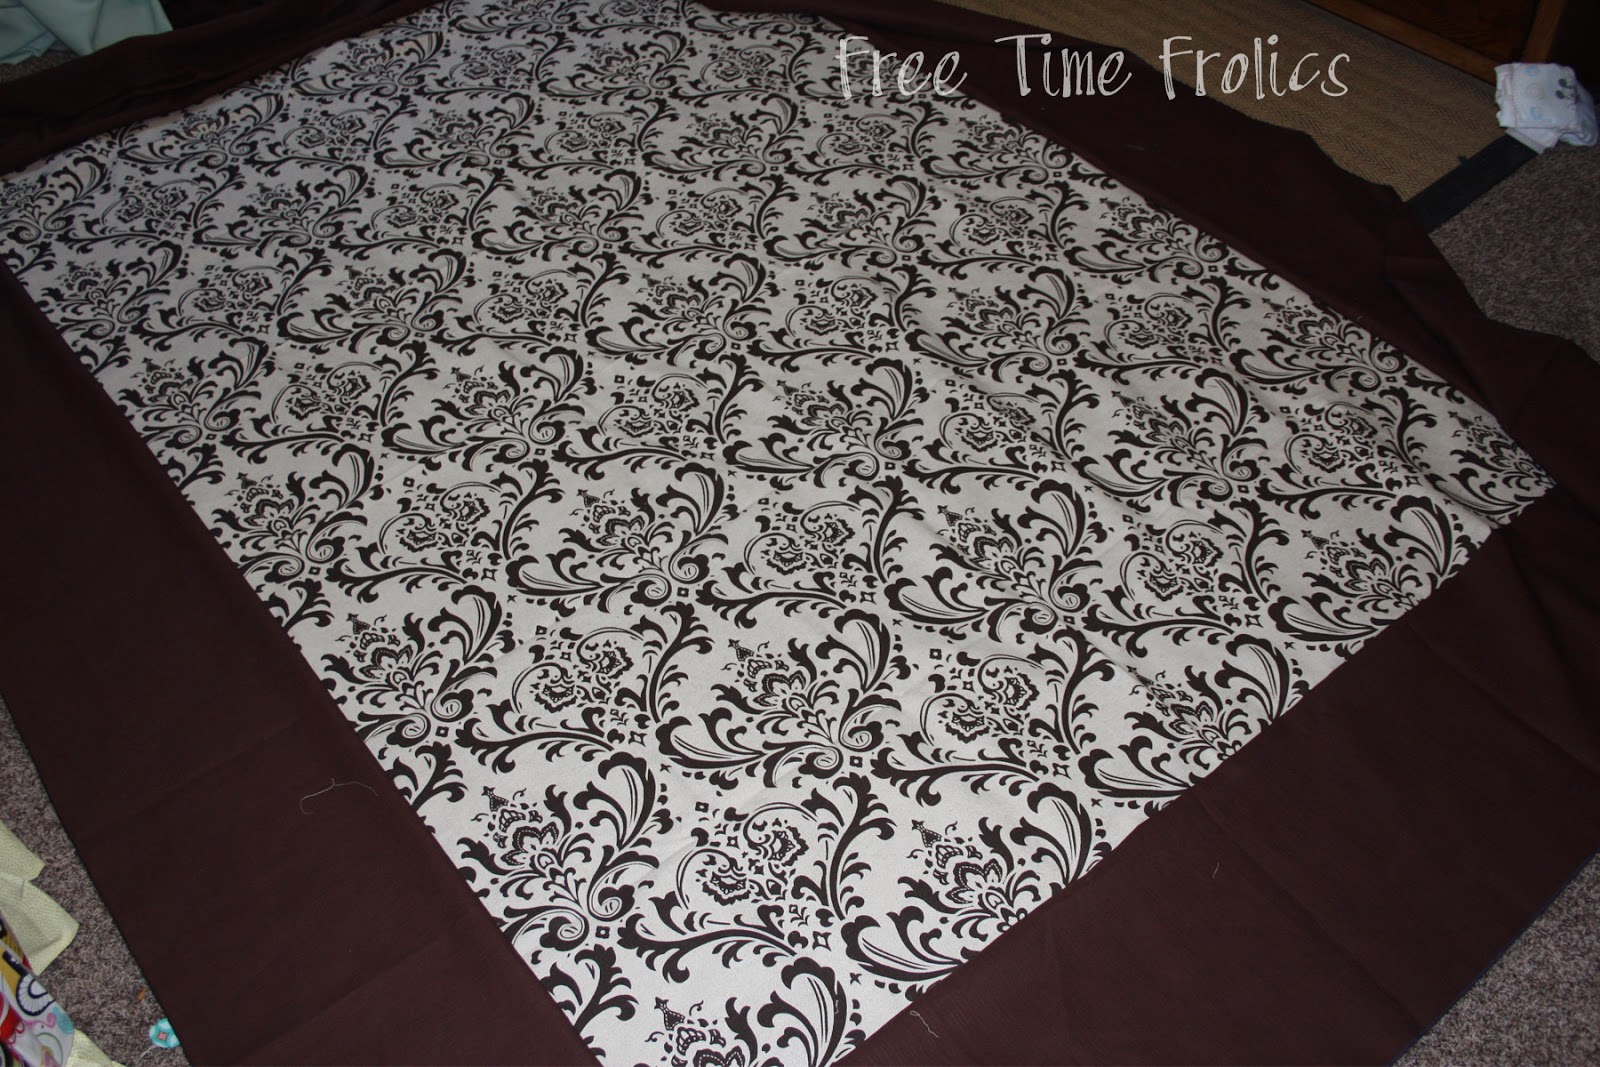
Here is the new fabric. Natural Cotton with a Chocolate Damask.  I love this print.  I bought a few yards a year or two ago at Home Fabrics and Rugs.  I have been saving it for a special occasion.  One just like this.


I added an outside border so I didn't have to piece any fabric.  I think it turned out great.  It makes a nice addition to my living room. 

 I used about 2 yards of damask fabric and 3 yards of brown.   I had some brown leftover for another project.
 So here is how I did it. 
My rug is 5x7.  My damask fabric is 54 wide.  I needed 12 more inches to make it wide enough.  So I added the brown.  I measured my length minus 12 inches. 
So my inside damask and backing fabric measured 54 x 78.

My border fabric was cut 3 yards x 13 inches. One piece was slightly wider.  I used these piece for the top.  So I would have a little extra for the folded flap.

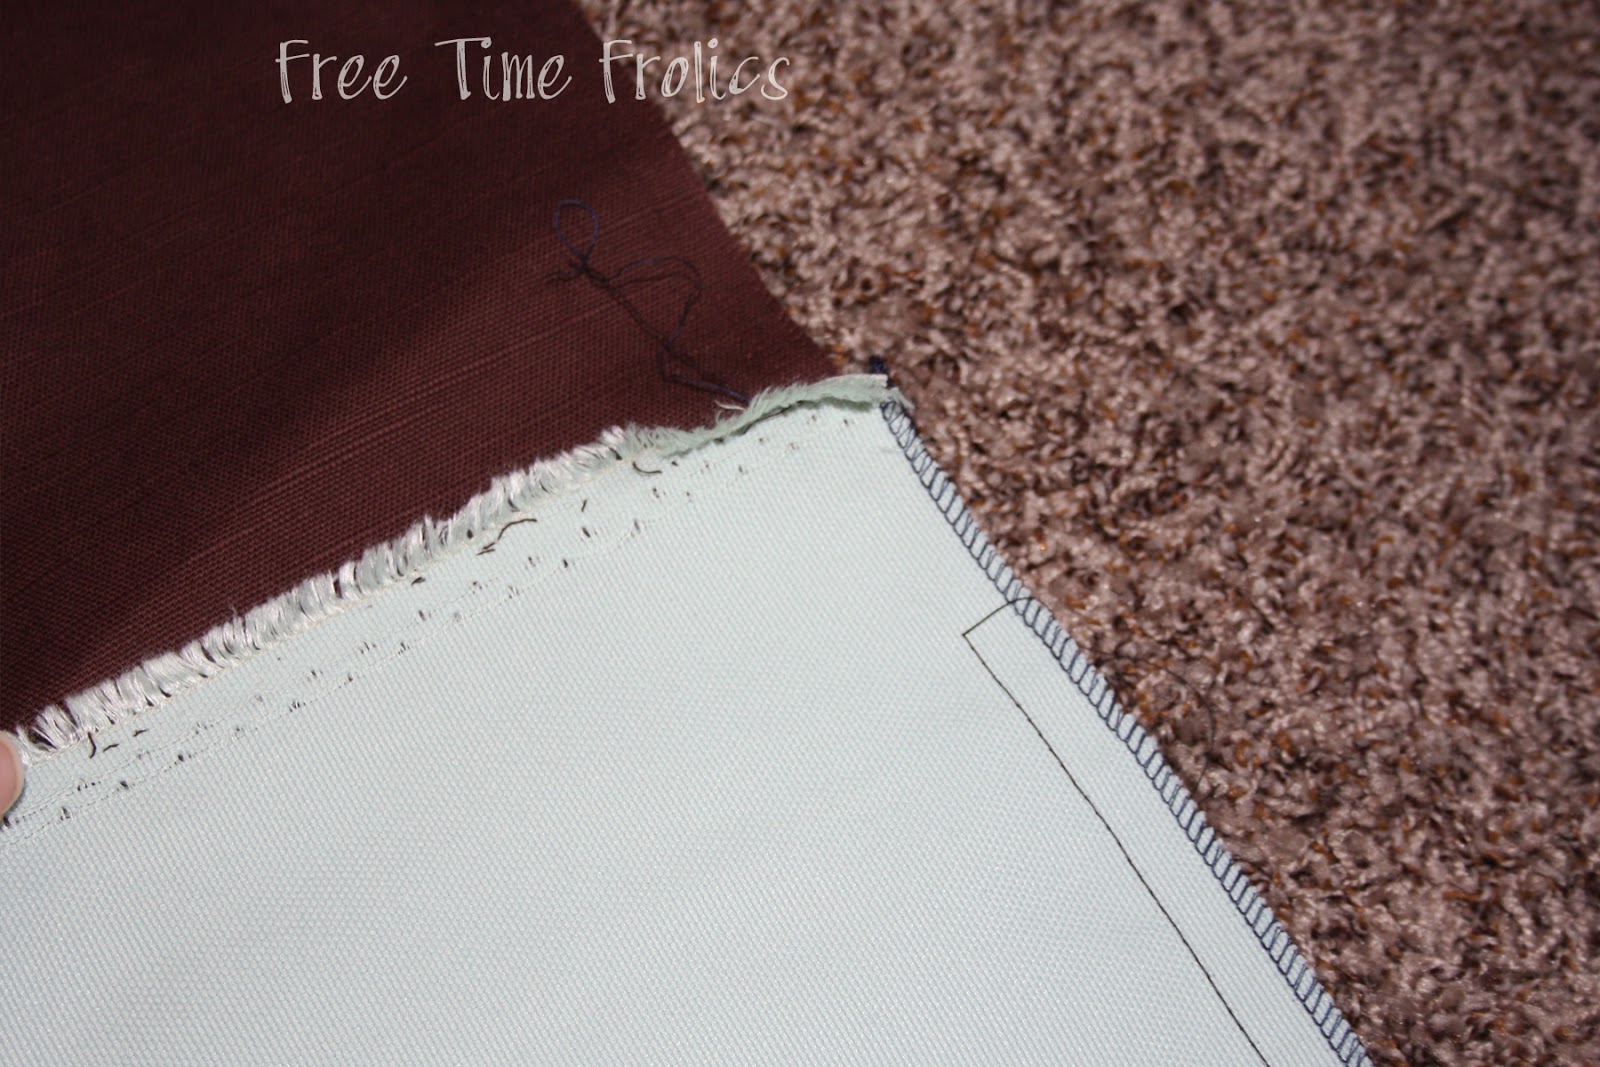
I sewed the side borders on first. Then the bottom and top.


Next pin the backing onto the top.  Right sides together.

Fold the border in half and pin the sides to the backing fabric.Stitch your side seams.
Leave our corners for the next step.

I made my corners with a mitered edge. 

Stitch your seam to make your corners. Trim off the extra fabric.
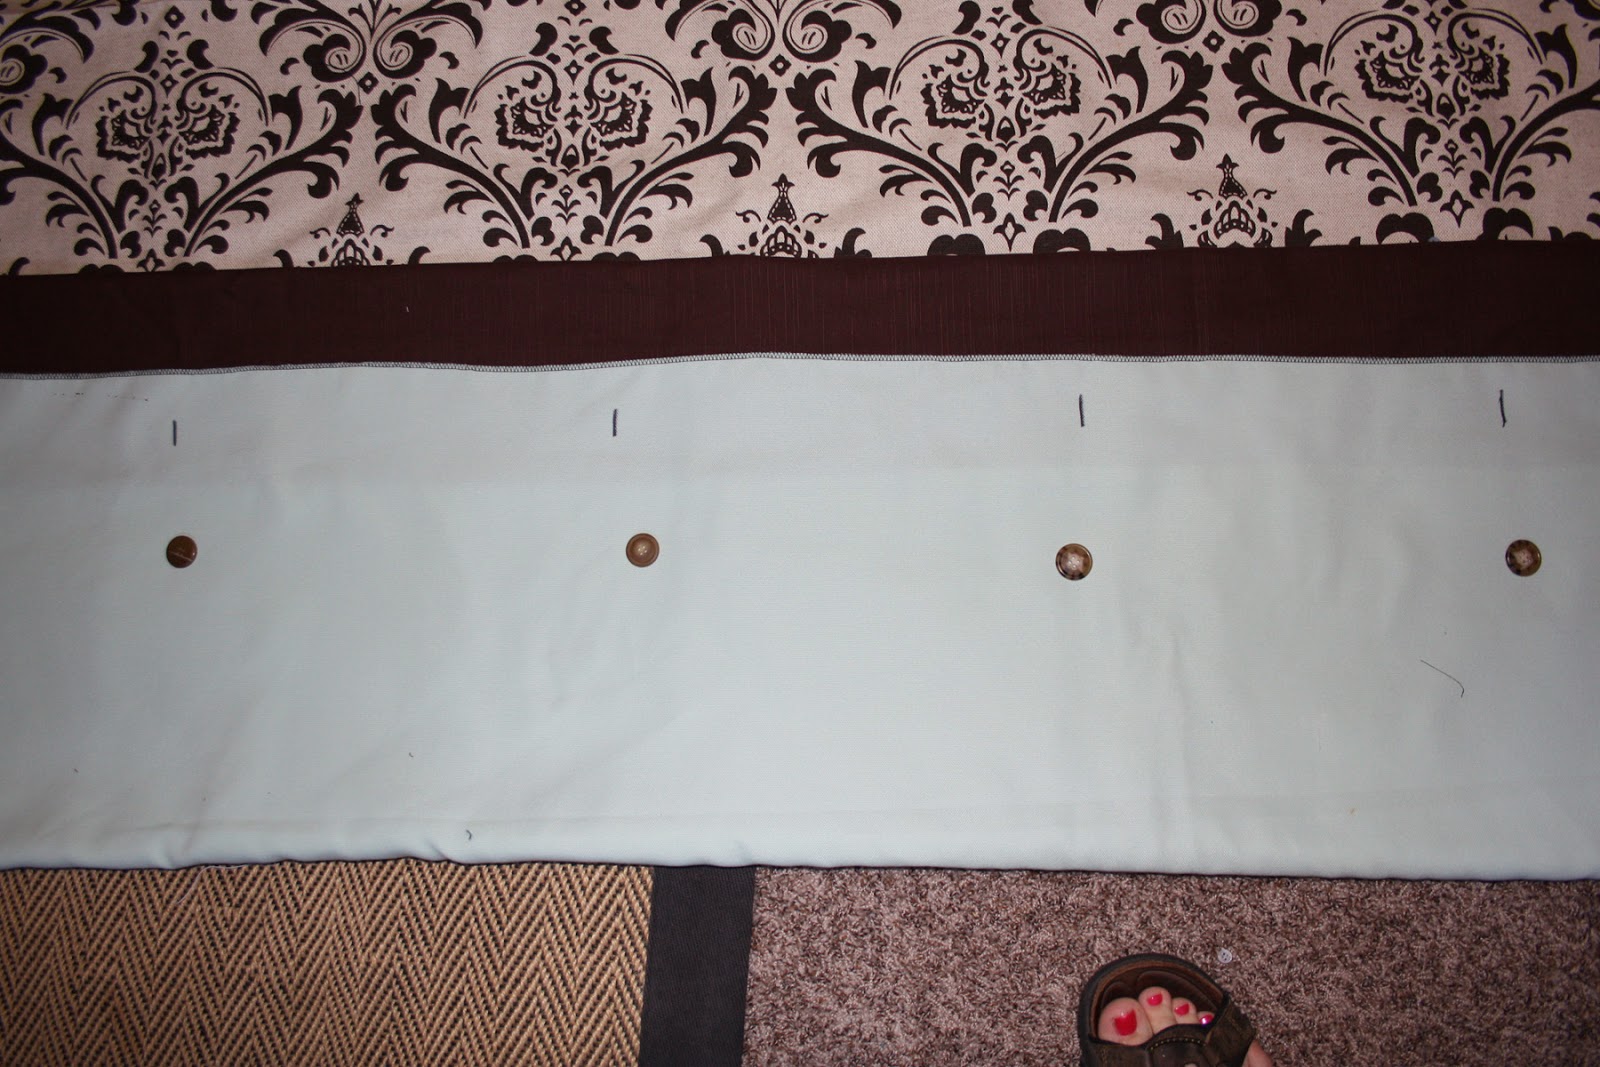
  For the top I folded the  top down so the top border is 6 inches.This makes the fabric become like a fold over sandwich bag.


Next I marked the backing fabric to make button holes. I made the button holes and hand sewed the buttons.


Slide your rug in and your done.

Your very own DIY Rug Makeover.

Linking up to:
I was featured on:
Featured at apinchofjoy.comDelectableHome five days five ways  feature friday free for all

Tuesday, April 10, 2012

Washi Tape Coupon holder


I have been thinking about another Washi Project.  I found these Coupon file envelope thingy's at Michael's along with some more Washi tape.So here it is!


Supplies:
Washi Tape
Accordion folder
I found these in the $1 section at Michaels
optional:  sticker letters or vinyl


Here is the Washi Tape I found at Michaels. 
The Brand is Recollections and they call it Crafting Tape.
My other Washi Tape is from Target and Mindy Maes Market.


I just cut the tape into strips and layered it on the folders.
It took me about 5 minutes.


Next I used my Silhouette and cut letters out to spell Receipt and Coupons. I layered them over the Washi Tape.


A great little folder for my coupons and receipts.
A little Pizazz in my Purse.


Related Posts Plugin for WordPress, Blogger...