Web Toolbar by Wibiya Free Time Frolics: sewing
Showing posts with label sewing. Show all posts

Sunday, September 16, 2012

Week in review

What a week!! Life has been crazy fun... I have so much to share. This weekend I was able to head to Utah and enjoy of Bloggers Night Out at Gardener Village with 100 other bloggers. Talk about fun.  These ladies were so wonderful to meet.  There were blogging celebrities everywhere.  Do you have a favorite Blogger??? Come back in a week and find out who mine is...

Here are a few items of business....

Just 2 more weeks until the Masquerade Ball starts. Are you ready?  I still have a few costumes to make. Time is going to fast.  If you want information on the Masquerade Ball click the link. I have soem great prizes to give away and one may go to you.  If you are interested guest posting please leave a comment or email me. cosettescloset {at}gmail.com.  I will get you all the info you need.

Free Time Frolics

Over the next couple of weeks I will be looking for Pattern testers to test 2 new patterns I am working on.  If you are interested in reading , making and giving feedback on one of these I would love to hear from you.

*Testers must be willing to sew project and get back to me in 10 days or less. 
* Pattern is for girls sizes 4-10
* One is for a Dress and the other a shirt and pant.
* Materials needed: Knit or cottons (outfit only)
* Tester will provide there own fabric and supplies.  
* I would love a picture of your child or grand child wearing the clothing.  
* Each pattern is expected to take 1-2 hours or less. Depending on your sewing skills.

If you are a blogger and want to try this pattern I would love to send it to you and get your feedback. Once the pattern has been reviewed, updated and ready to print I would love to send you a free copy and one to give away on your blog.  If you are interested in working with me I would love to hear from you!
Have you ever wondered how many ways you can use corn??  I have. So i decide to make a week out of it.  Be sure to come back tomorrow for Corn Week.  Projects you can make, decorate and eat all out of corn. You won't want to miss it!!


Wednesday, August 8, 2012

1 {Skirt} 10 {Ways}–Apron Skirt

If you have been following the series. You know I have made a basic skirt and a basic skirt with a contrasting band. Today we are going to add  a sweet little apron.  Adding something like an apron give this skirt a little personality.  A perfect little skirt to start school.

Apron Skirt

Start by doing steps  1-4. Measure & cut, sew side seam, Fold hem, iron and stitch.
You next step is to make your apron.  Measure your apron and cut 2 pieces.  Mine for a size 4 was approximately 12x 12. 
Lay one piece right side up.

apron skirt 1

Lay your ribbons or trip ontop and pin into place. Stitch your ribbons down.

apron skirt 5


Lay second apron piece down on top of front of apron.  Right sides together.Stitch around 3 sides.

apron skirt 2

Turn right sides out, top stitch around your 3 sides and embellish.

apron skirt 4

To finish your  skirt, find center.  Pin the center of the apron to the center of your skirt.  You can either pin this into place or do a basting stitch  to connect the skirt to the apron.

apron skirt 6

To finish your skirt, fold the top 1/4 inch and press.  Fold over 1 more inch to make a casing.  Stitch around casing leaving a 1 inch hole to add elastic.  Thread elastic through casing. sew elastic ends together  then close casing.  Your skirt is all done.

aprin skirt8


Add a fun pair of leggings or tight and your little Miss is ready for school.  If you have any questions about this tutorial please don’t hesitate to email me. 
name tag
Like my blog. Come follow me.  You can find me here:

Thursday, July 26, 2012

1 Skirt {10 Ways} Series day2

This week I am using my basic skirt pattern and adding a band.

 
Measure the bottom of your skirt. Cut your band the same width plus 1 inch. 

Sew your short ends together.  Iron the seam flat.

Fold your band in half. Iron.

Pin the raw edges to the right side if the skirt.  Pin into place. Stitch the skirt and band together.

Fold band down and press.  For a clean finished look, Top stitch the band to the skirt.


You are all finished. A little hem band makes a huge difference.
This little beauty is going to Skirting the Issue.  For more details click on the button below.


Simple Simon and Co

Wednesday, July 25, 2012

1 Skirt {10 Ways} Series Day 1

Do any of you have a little girl that LOVES skirts.  I am right smack dab in the middle of "I want to wear a skirt"  everyday with my 4 year old.  Who cares that she has adorable shorts and dresses to wear.  She only wants skirts.  So I have been making skirts to please this little one.  But who wants a bunch of boring skirts.  Not my little Miss.  She wants them fancy.  I am taking a simple skirt and making it 10 ways. So here is day 1.

Supply List:
Fabric
Thread
Elastic

Start with your fabric.  I have made this skirt for a 4 year old. I like to use the basic sizing found Here.
I like to start with my fabric 15 by 45 inches.  For a good length measurement.  Take your finished length you would like the skirt and add 2 1/2 inches.  This with give you one inch for the Hem and 1 1/2 inch for your waistband.
Sew your Two short ends together. These will also be your selvage edges.
If you have a serger you can serge your 2 long raw edge.

If you have a serger you can serge your 2 raw edge.

Iron a 1 1/4 hem for the top and a 1 inch hem for the bottom hem.

Stitch along the top edge of of the casing hem.  Using the edge of your presser foot as a guide.


Now to stitch your casing.  Use your presser foot as a guide. Stitch around the entire skirt leaving a 1 inch opening for  your elastic.


For my 4 year old, her waist is 20 inches.  I cut my elastic at 22 inches. Thread your elastic through opening.  Overlap elastic and stitch together.  Place elastic in casing and stitch the casing closed.

Your skirt is done and ready to wear.
These skirts are super simple to make.  So easy you may want to consider making a few for Skirting the Issue.  Simple Simon & Co have started skirting the issue.  They are trying to get 100 dresses by the first week of August to donated to Foster care programs in you area.  Or you can ship them to a few locations on there website.  So come join in and share the love! Check out Simple Simon & Co for the details.

Simple Simon and Co

Thursday, July 19, 2012

Onesie Bow Tie

Did you see my Onesie Neck Tie Post??? How about a bow tie?  I thought this would be a cute addition to your little guy's wardrobe.   This tutorial is easy and simple. You can probably make one in 30 minutes or so.  

Sunday, July 8, 2012

Onesie Neckties {Big Boy Style}

I found this great tutorial for Onesie ties over at Brassy Apple.  I love the simplicity of the little Onesies.  I started thinking, maybe I could give this a little more of a big boy look.  So I started playing around and came up with this.


Friday, June 22, 2012

{Pin}tastic Friday- Must have Maxi Dress

I found this pin a few weeks ago and finally got the time to make one for my Little Miss.  Simple Simon & Co. Made this adorable Maxi dress from a T-shirt and Knit fabric. 
So I thought I would give it a try.  My Little Miss has been begging me for a Zebra Dress. So with a little zebra print and a cute hot pink shirt I went to town to make one of these with a twist. Here is my take on the Must have Summer Maxi.

 I added a flower to the front and a little clip in the back to take it in.  I made this with a size 5 t shirt and it was a little big.  So I added a little length to let her grow. She loved wearing it to church and wants to wear it all the time.  I make have to make a few more to get us through the summer.
The best part about this dress.  It took me 30 minutes to make.  {Bonus} Perfect for summer! Now go make a few for your little miss!

Monday, June 18, 2012

Little Bo Peep Costume Inspiration

Little Bo Peep Costume Inspiration www.freetimefrolics.com

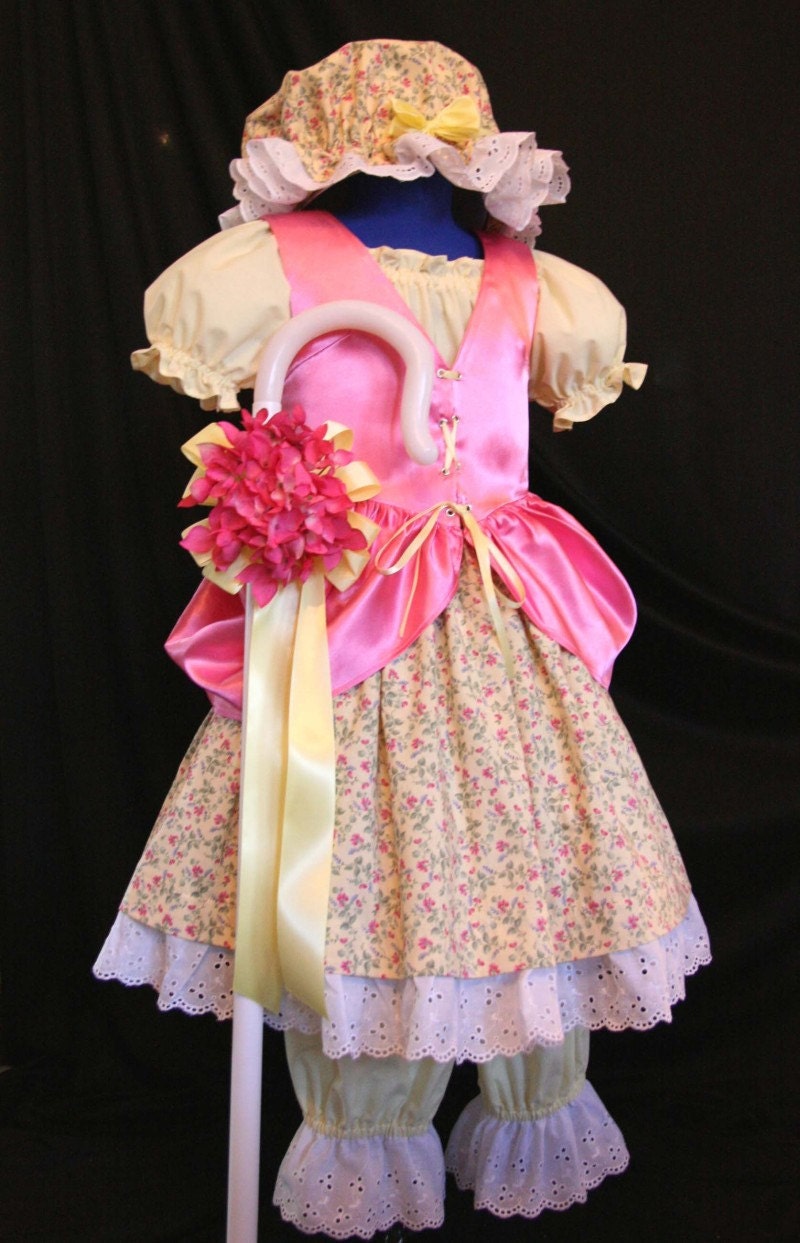
Since I found out I was having a little girl.  I wanted to make her a Little Bo Peep Costume. She is finally the ripe old age of 4 so I thought I had better get the costume done before she starts wanting to think of her own costumes. I found this beautiful Little Bo Peep Costume on Etsy one day (Pinned it) and decided it was what my Little Miss was going to be for Halloween.

                                     
Little Miss MUFFET/Bo PEEP Costume Custom CHILD Size
(Photo from Etsy store Mom2rtk)
She makes lots of beautiful costumes year round in her shop.

Isn't is beautiful??  I just loved the colors and the style.  Perfect for my Little Miss. She has these beautiful natural blond curls and a sweet little smile, to go with the outfit. The price was a little out of my budget.  So off I went to make my own with a little twist.

I found a lamb at the end of the Easter season for $3. I made a bonnet instead of a fabric cap out of Tim Tex, fabric and ribbon. And I used an old outdoor candy cane from Christmas as her crook wrapped in ribbon and fabric flowers. It was the perfect size for her.  I used my own peasant styled shirt pattern and made a basic skirt and bloomer pattern.  For the vest I used a simple tutorial from Make it - Love it and added the hip plumes myself. Here is how it turned out.


My Little Bo Peep.

Monday, June 11, 2012

Womens Tank to Little Girl Maxi


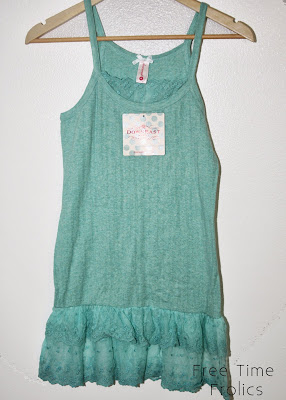
Maxi's are all the rage this season.  I wanted one for my little miss but they are hard to find.  I was shopping at a local mall and found an adorable tank for women.  I am not much of a tank top wearer but it is adorable for my Little Miss. Here is what I started with.... A lacey tank from Down East.


I cut off the bottom of the tank just below the arm pit.  Leaving the most length possible.


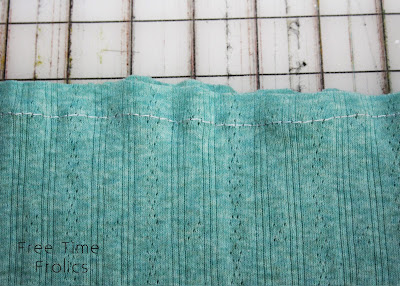
Stitch a basting stitch around the top of the skirt.  You may need to gather the skirt a bit  before sewing on the waist band.


For the waistband I had a piece of knit that was a perfect match . I measured my Little Missy's waist and subtracted 1 inch. Knit is really stretchy.  I cut my fabric 19 by 6. Fold your waistband in half lengthwise and right sides together. Short ends together.  Stitch. You should have a circle for a waistband. 


Fold the band in half to make it 3 x 18 round. Pin the band to your skirt. Giving the skirt and even gather if your must gather. Stitch around with a knit stitch. securing the waistband to the skirt.
Here is how my skirt turned out.


I think it turned out so cute.  She loves it! I think it makes her look so grown up.  Fun and easy for the summer.  Great for the beach, church or a day of shopping. Head out and find a tank for your Little Miss.


Related Posts Plugin for WordPress, Blogger...