

Showing posts with label Home decor. Show all posts
Showing posts with label Home decor. Show all posts
Thursday, July 5, 2012
Bathroom {Art} Printables
I have been needing to decorate my sons' bathroom. Since I have boys I was wanting something a little more masculine. I thought these printable's would be perfect. A cute & funny reminder of what should take place in a bathroom. Sometimes kids need a little help, right???
I saw something similar to these on the web one day and wanted to buy them or down load them or something. But alas, I had to make my own Bathroom Art. Here is what I came up with.

Monday, July 2, 2012
Firecracker Table Decor
Firecrackers are always a great way to decorate for the 4th. Here is a fun tutorial to use for your table scape or mantel.

Wednesday, June 27, 2012
Fancy House Numbers
How is your summer going??? Ours is in full swing. The kids are home and we are trying to stay busy. In between all the crazy I have been working on a few projects. Here is one I think you will like. I was talking with a friend of mine about my front porch. I have no clue what to do about it. She told me about a show that shares tips for making your house appealing. From the outside. (No cable at this house. Just digital rabbit ears for basic local stations). On one of the episodes they mentioned 3 things to make you house look inviting from the outside.
1. Paint your door a fun bright color.
2. Add Shutters
3. Have a fun way to display your house numbers.
So after contemplating each of them I decided that #3 was the way for me.

 Here is my supply list:
1 lenght of Pine. 2x8
long rectangel brackets to secure boards together
screws
Paint colors of choice
numbers for my house
picture frame
chalkboard vinyl
I started with 1 length of pine. I cut it into lengths of 18 inches. I ended up with 5 lengths with a few inches left.

Next I spray painted my numbers black. And sprayed my boards my color of choice. I went with turquoise, burnt orange and white. I did a light coat, to let the wood grain show through a bit.

Sand your boards just a bit, if you like for a bit of a weathered look.

Lay your dry boards together how you want them. Flip them over and screw your bracket into place.

Once my brackets were secure I flipped my boards back over. I placed my numbers where I waanted them and screwed them into place.

I added this frame so I could leave messages for visitors coming in. Sleeping baby please knock, Leave packages at the door or Welcome friends. Lots of options for this little frame.
So I found the frame at TJMaxx. I sprayed it my favorite color (Turquoise) and took out the glass. I cut a piece of chalk board vinyl I got from Pick Your Plum and placed it inside the frame. I added the glass behind it and a piece of card board. Took the back of the frame off. It had a back with a stand on it that you could see if was on.
I used 4 nails ot hang the frame on and keep it from moving.
Hang your numbers outside your door and enjoy. I love the pop of color it adds to my front porch.


Thanks for sharing your Free Time with me. Have a great week.


1. Paint your door a fun bright color.
2. Add Shutters
3. Have a fun way to display your house numbers.
So after contemplating each of them I decided that #3 was the way for me.


1 lenght of Pine. 2x8
long rectangel brackets to secure boards together
screws
Paint colors of choice
numbers for my house
picture frame
chalkboard vinyl
I started with 1 length of pine. I cut it into lengths of 18 inches. I ended up with 5 lengths with a few inches left.

Next I spray painted my numbers black. And sprayed my boards my color of choice. I went with turquoise, burnt orange and white. I did a light coat, to let the wood grain show through a bit.

Sand your boards just a bit, if you like for a bit of a weathered look.

Lay your dry boards together how you want them. Flip them over and screw your bracket into place.

Once my brackets were secure I flipped my boards back over. I placed my numbers where I waanted them and screwed them into place.

I added this frame so I could leave messages for visitors coming in. Sleeping baby please knock, Leave packages at the door or Welcome friends. Lots of options for this little frame.
So I found the frame at TJMaxx. I sprayed it my favorite color (Turquoise) and took out the glass. I cut a piece of chalk board vinyl I got from Pick Your Plum and placed it inside the frame. I added the glass behind it and a piece of card board. Took the back of the frame off. It had a back with a stand on it that you could see if was on.
I used 4 nails ot hang the frame on and keep it from moving.
Hang your numbers outside your door and enjoy. I love the pop of color it adds to my front porch.


Do you see the nest on my front door wreath? I made the wreath and hung it back in April. Within 2 days a cute little Mama Robin began building her nest. She worked on it for a week. Then abandoned it because there was so much traffic. Everyone askes me where I got the nest. They can't believe a bird built it. Someday I will take it down and save it for someplace special.

Thanks for sharing your Free Time with me. Have a great week.

Thursday, June 21, 2012
Patriotic Pinwheels {Washi} style
I have been racking my brain at what I wanted to do for my 4th of July Mantel. I have had a few things in mind but it needed some finishing touches. I was blog hoping the other day and found 52 Mantels. I saw Emily's all paper mantel and loved her flowers on the wall. It totally gave me the idea why not use pinwheels. So I started looking for paper. When I couldn't find what I wanted I thought "I have all this washi tape. What if I ..." and there it was. Just what I needed to finish my Mantel. Washi Tape Pinwheels. So here you go.


Wednesday, June 20, 2012
4th of July Mantel
 |
| 4th of July Mantel |

Its time again for a new Mantel. I started a summer mantel but didn't get it finished. So I figured I would do my 4th of July Mantel and use it for most of the summer. Here are a few features on my Mantel. I decided to go with an Uncle Sam Kind of theme.

Uncle Sam print. I used the tutorial (Here) to make the print. My Uncle Sam is 11x14. The little Uncle Sam hat was made from a pattern from The Quilted Fish. (Here) The Small Fire crackers tutorial is Here.
Simple striped bunting with felt star. I have them stuck to the shelf with poster putty.

Washi Tape Pin wheels. Who needs fancy paper when you have washi and plain paper.


I used my 4th of July Printable here for the framed subway art.
So there it is my 4th of July Mantel. It looks amazing on my shelf. So fun and Patriotic. Come back tomorrow or a Tutorial on the Washi Tape Pinwheels. They are super easy and fun to make in with the kids in your Free Time. Thanks for visiting.

Sunday, April 15, 2012
Rug Slip Cover Makeover
Since moving into our new home I have been slacking when it comes to decorating. Pregnancy and a new baby really take its toll. But finally I am feeling good enough to do something.
I finally got the "get my house decorated bug."
I have this new, larger home than the last. Which means money. I have limited funds to fancy up my casa. But I am determined to do this on a budget.
From our old home I have this rug. It is still in fair condition. But the style is not mine anymore. I have been looking for the right rug. But I just haven't found what I want. Or can not afford what I want. Then I had an idea.
Just did a little DIY rug recovering.
My thought was to make it like a duvet cover. It just slips on and off.
So I searched through fabric I already had. (I buy fabric on a whim if I love it. It is a terrible habit. I have quite the collection of fabrics in my craftroom.) And found one I thought would work.
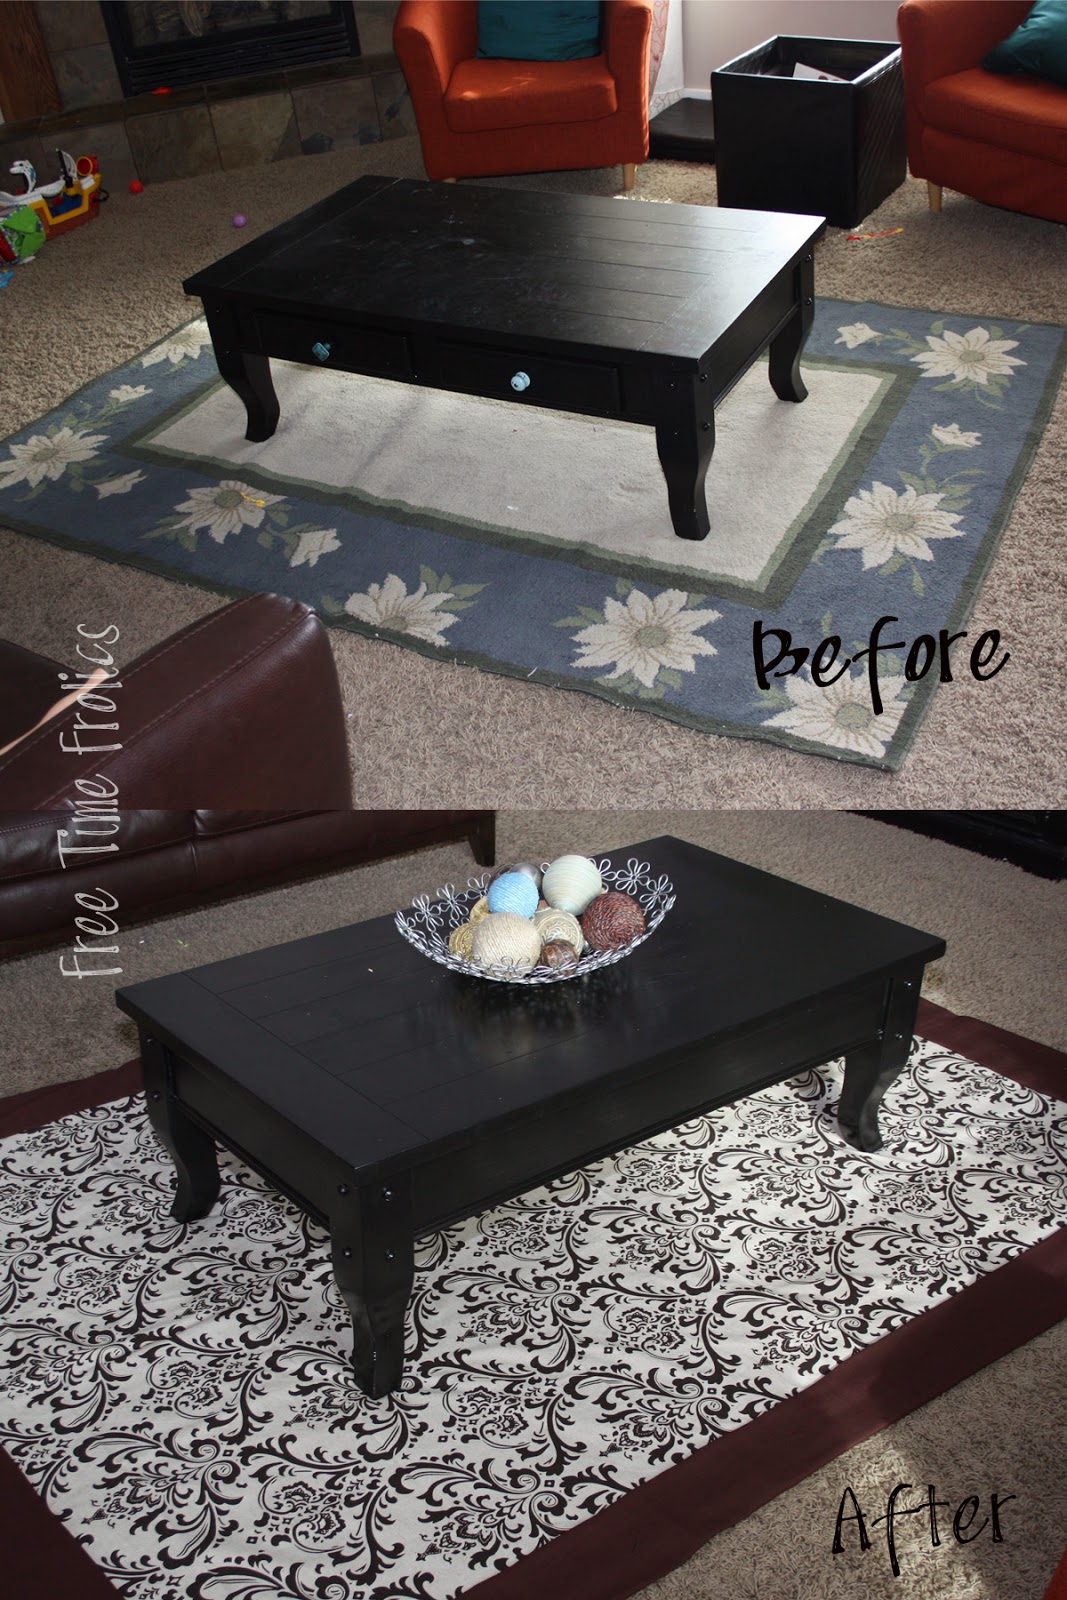

So here are the before and afters.
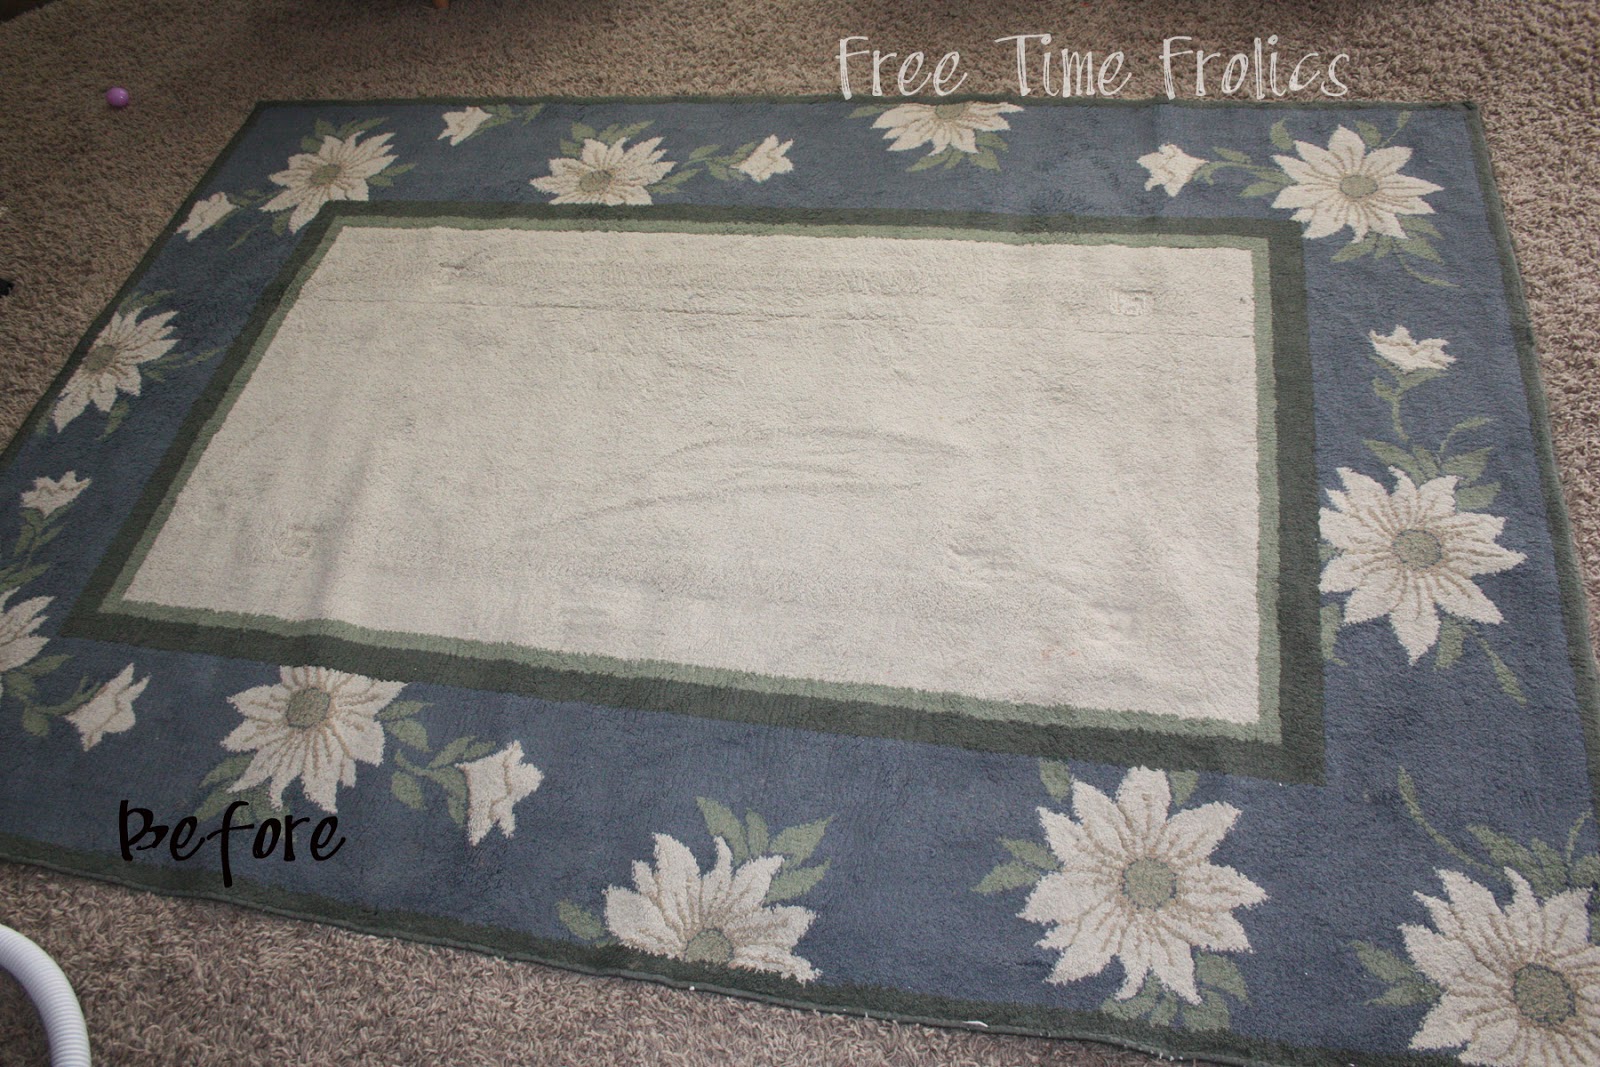
See that adorable blue and green with sun flowers.
It needs a little pick me up.
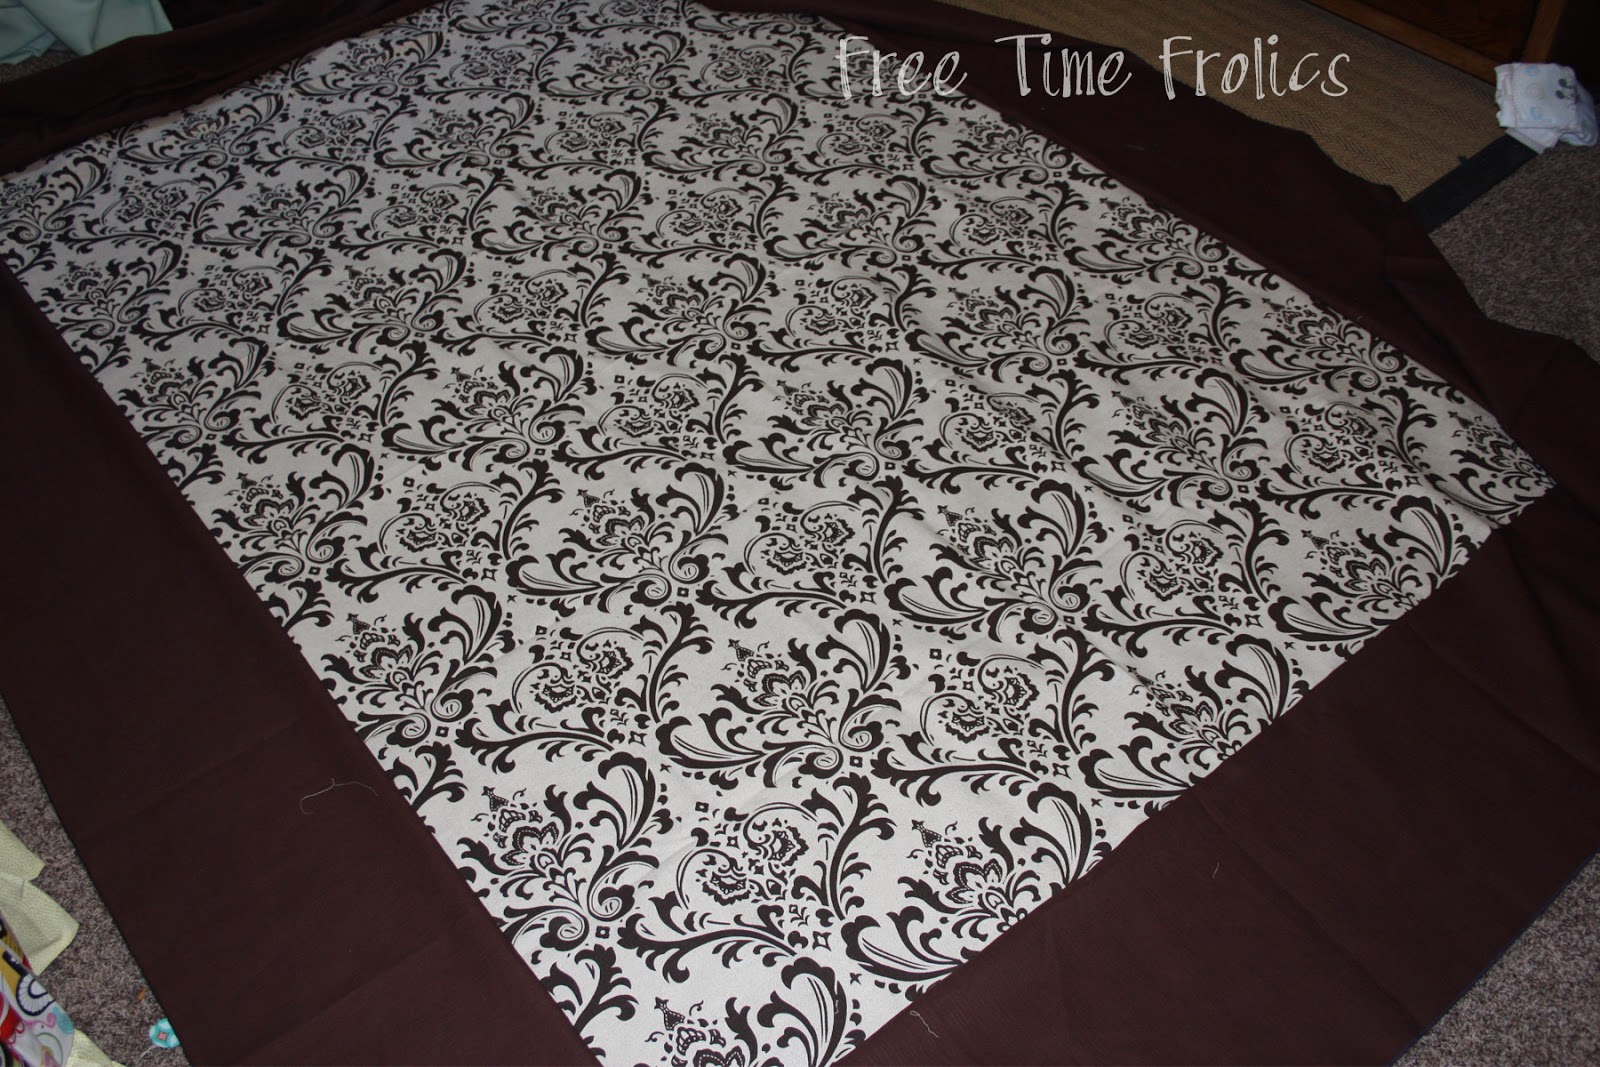
And here is the after.
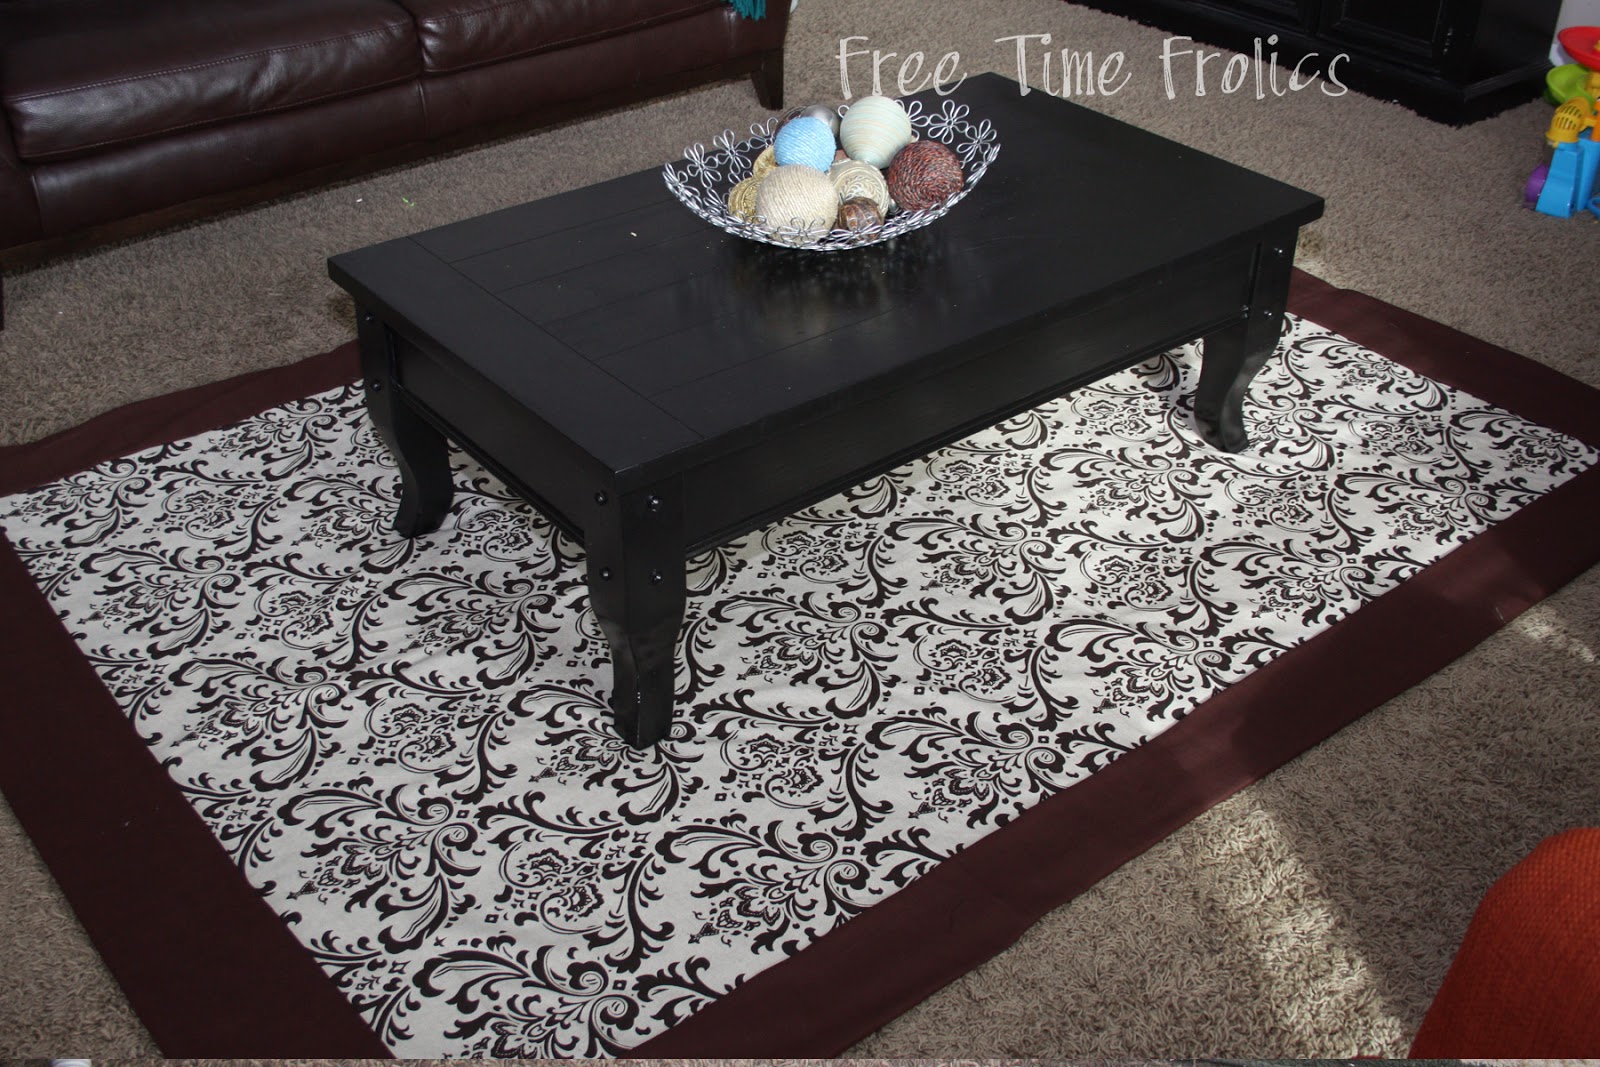
Here is the new fabric. Natural Cotton with a Chocolate Damask. I love this print. I bought a few yards a year or two ago at Home Fabrics and Rugs. I have been saving it for a special occasion. One just like this.

I added an outside border so I didn't have to piece any fabric. I think it turned out great. It makes a nice addition to my living room.
I used about 2 yards of damask fabric and 3 yards of brown. I had some brown leftover for another project.
So here is how I did it.
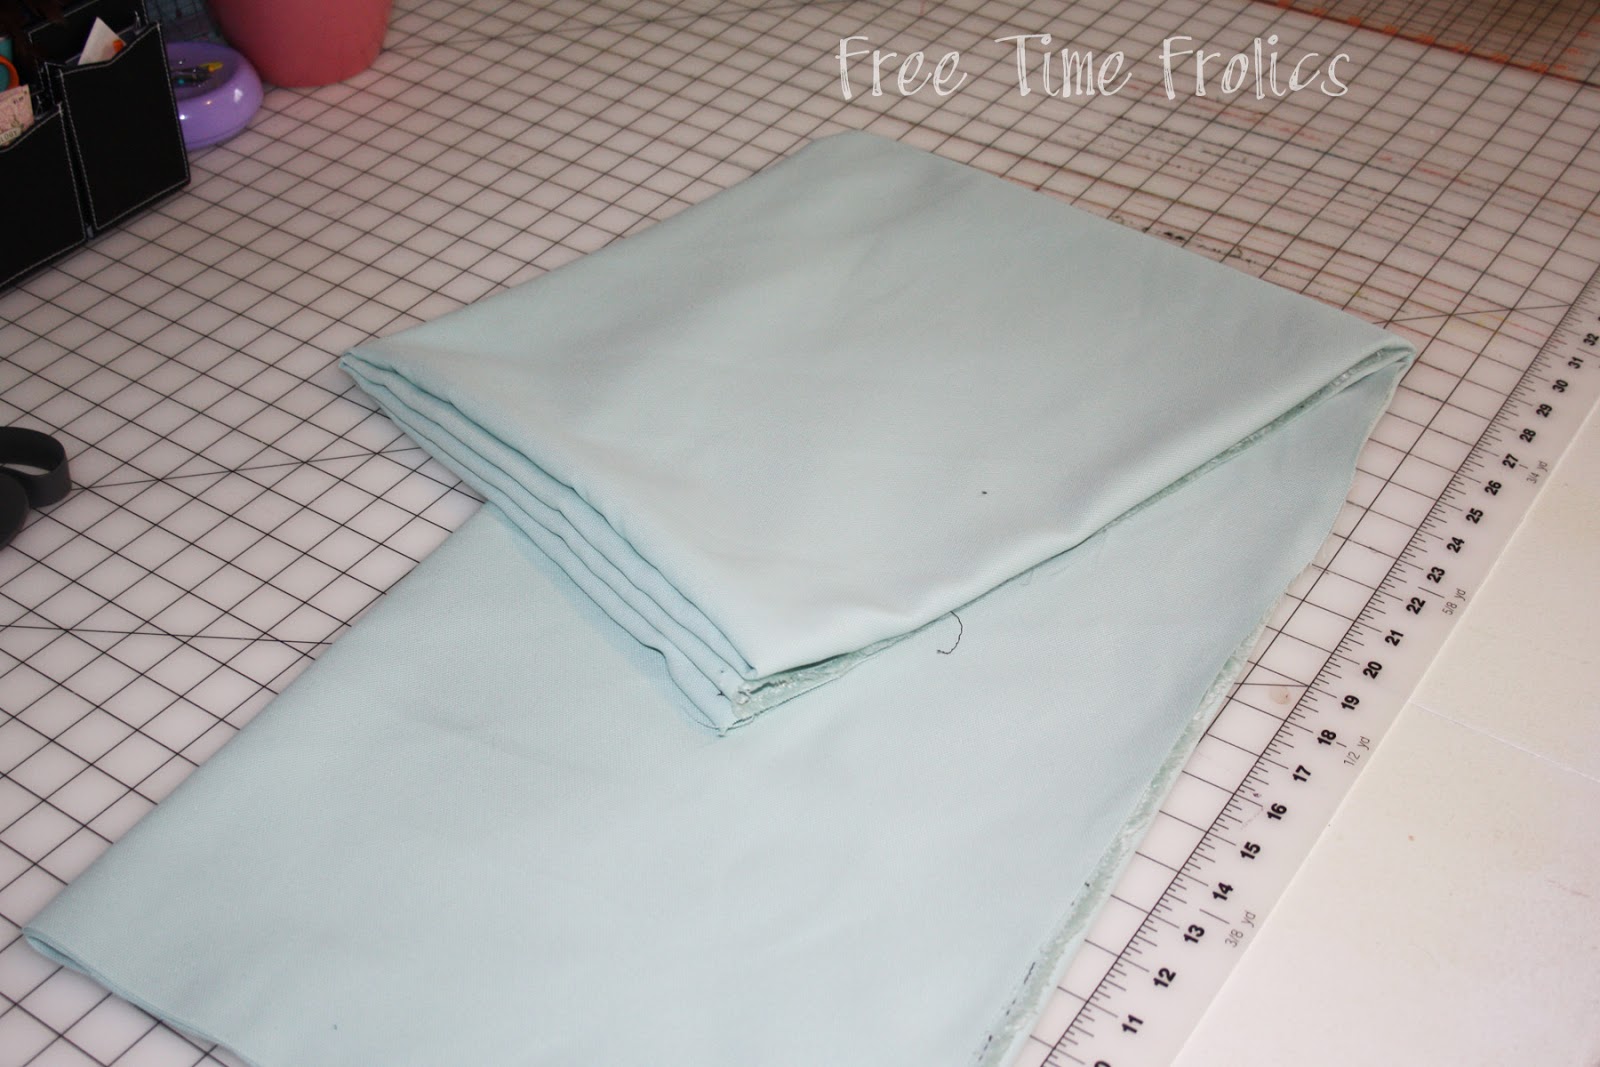
My rug is 5x7. My damask fabric is 54 wide. I needed 12 more inches to make it wide enough. So I added the brown. I measured my length minus 12 inches.
So my inside damask and backing fabric measured 54 x 78.
My rug is 5x7. My damask fabric is 54 wide. I needed 12 more inches to make it wide enough. So I added the brown. I measured my length minus 12 inches.
So my inside damask and backing fabric measured 54 x 78.
My border fabric was cut 3 yards x 13 inches. One piece was slightly wider. I used these piece for the top. So I would have a little extra for the folded flap.
I sewed the side borders on first. Then the bottom and top.
Next pin the backing onto the top. Right sides together.
Fold the border in half and pin the sides to the backing fabric.Stitch your side seams.
Leave our corners for the next step.
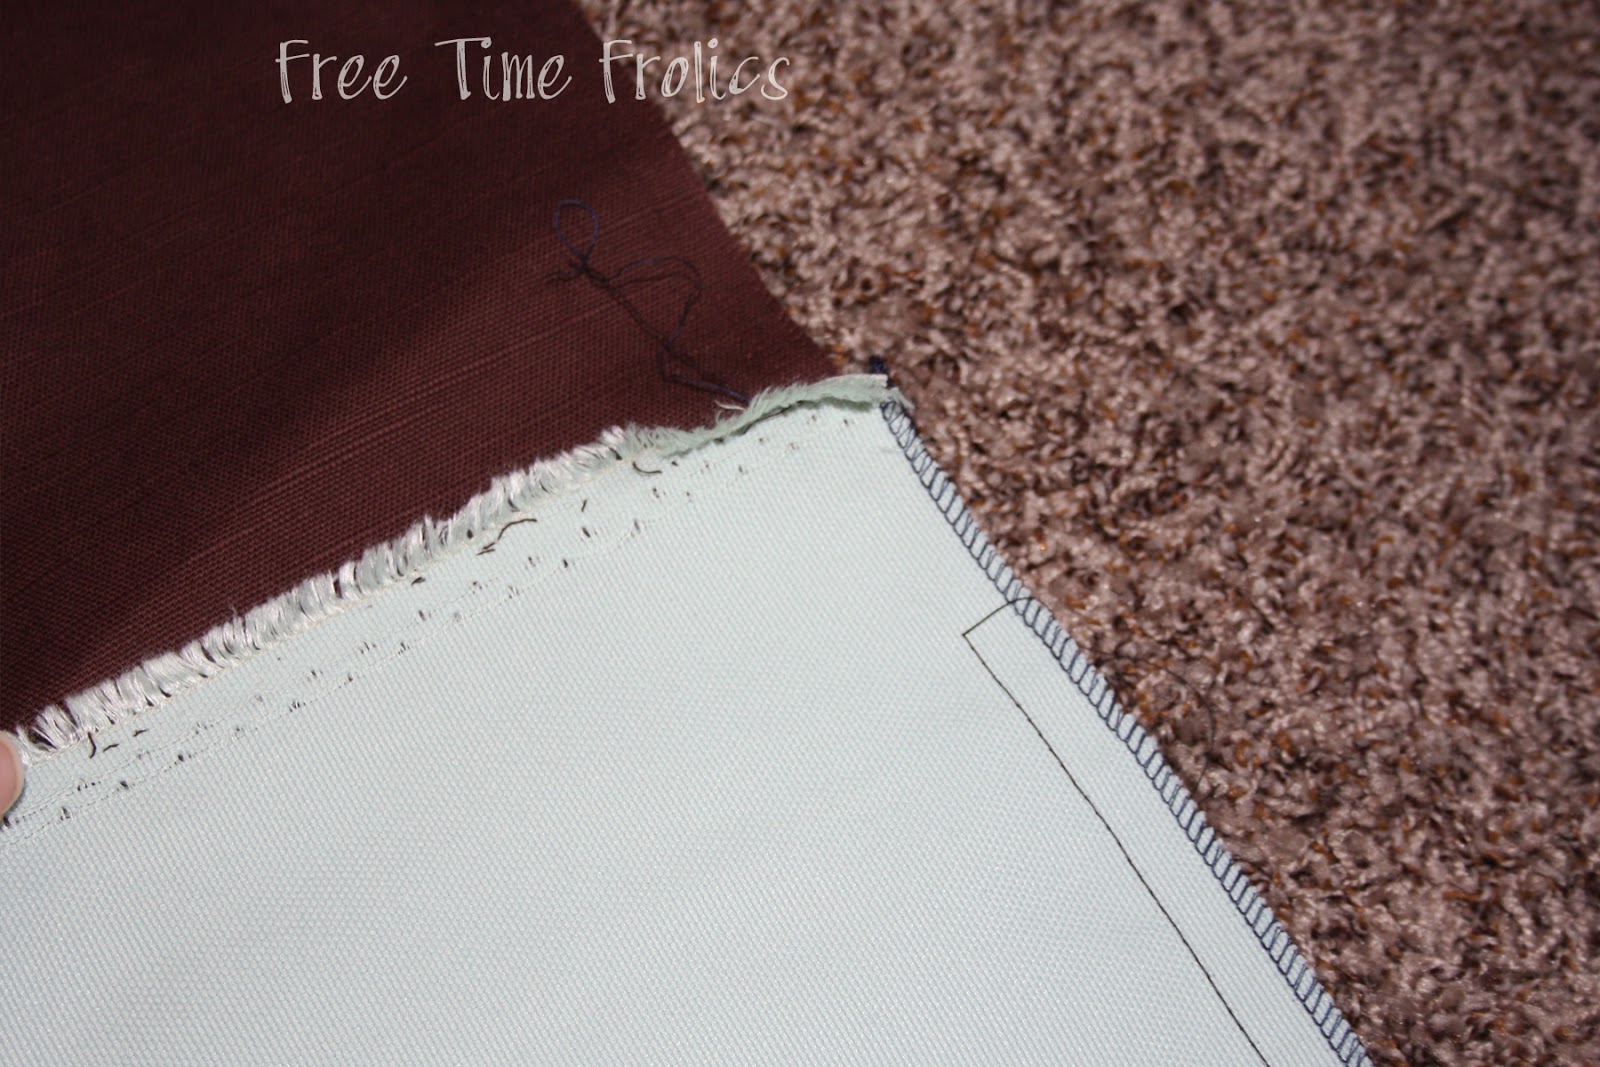
I made my corners with a mitered edge.

Stitch your seam to make your corners. Trim off the extra fabric.
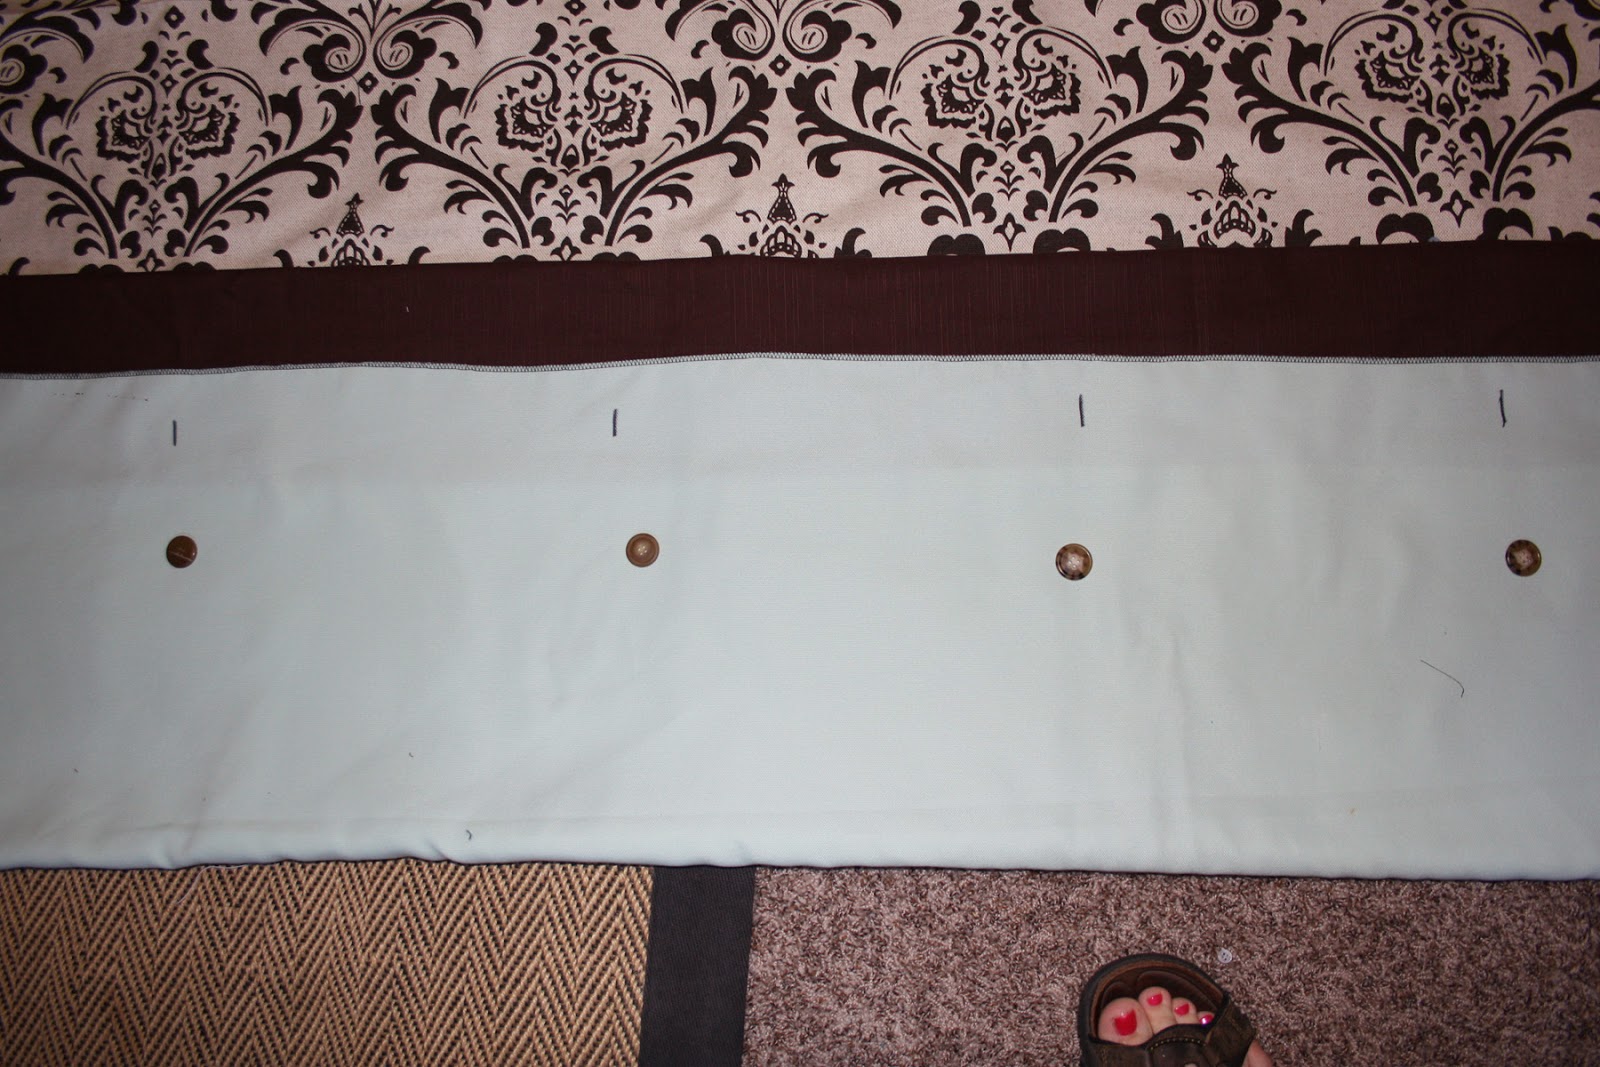
For the top I folded the top down so the top border is 6 inches.This makes the fabric become like a fold over sandwich bag.
Next I marked the backing fabric to make button holes. I made the button holes and hand sewed the buttons.
Slide your rug in and your done.
Your very own DIY Rug Makeover.
Linking up to:
I was featured on:


Subscribe to:
Posts (Atom)