Web Toolbar by Wibiya Free Time Frolics

Monday, July 15, 2013

Back to School Blast! Shopping List {Free Printable} + Giveaway

Getting your family prepared to head back to school, can be difficult especially after a long, fun-filled summer. Here are a few of our favorite Back to School Tips to help you along the way.
1. Back-to-School Supplies Checklist - Backpack? Check. Pencils? Check. Safety scissors? Not Yet. Use the same checklist each time you head out to grab supplies, to keep track of what you have already purchased and the things you still need to. These are also handy if you have more than one child. Simply print 2, 3, 4 list and add their name to the top.


I know its a little early to be thinking back to school.  But I wanted to get this one up and going for all of you. Back to School Shopping is just around the corner. With 4 kids and a busy schedule I can never remember what I have or need for my kids.
 I have boys who really don't like shopping and they don't really care what clothes they wear. (I am lucky we haven't hit that stage yet.) So I find that I do a lot of their shopping for school clothes when I am just out and about.  I usually check out the sale racks each time I go shopping. The same for my daughter.  The only problem, I have 4 kids and I can never remember sizes. Especially for shoes! The little buggers keep growing!  
If your kids are like mine they are growing like weeds! I feel like I am always on the look out for a bigger size in clothing.   So I search the internet for clothing suggestions for kids. I found  this great article on wiki how.  It gave some guidelines and suggestions for how many of each item to buy.  For me some were over exaggerated.  (My kids don't need 15 t-shirts) So to help keep track of what I have bought, and what we need,  I put together these fun colorful printable's to help you keep track of what you have and what you need to buy. I have included a separate list for boys and girls. Pick the color you like and print.  Be sure to follow the rules of my free printable usage!

Friday, July 12, 2013

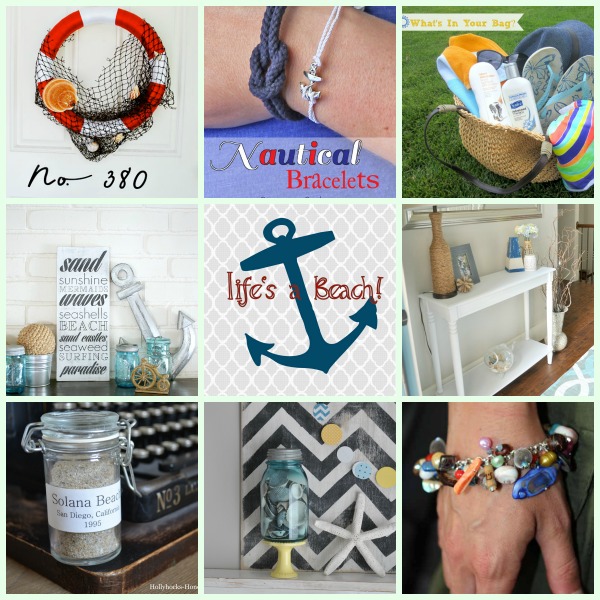
Nautical Bracelets + Life's a Beach Round Up

July's Blog Hop
Life's a Beach!
8 Blogs 8 Awesome "Beachy" Ideas

 I love this time of year the weather's warm and the kids are out of school and for a few months the world seems to slow down a bit...And so with that being said we figured since all of us are land locked and dreaming of being at the beach; we'd  use our crafty skillz to bring a little beach ambiance to our landlocked homes and lives. So if you too are wishing and dreaming of being at the beach, but can't join our club and enjoy our "Beachy" best!  Better yet pull up a seat, but your feet in a kiddie pool and grab an ice cold drink of your personal preference and cool off with these refreshing ideas. 


8 Blogs 8 Awesome "Beachy" ideas that will rock your world!!!

Stop by and visit all my AMAZING Bloggy friends and check out how the Beach has inspired them!! 

1. Emily of The Benson Street 
2. Adrienne of Free Time Frolics
3. Ashley of Flats to Flip Flops
4. Rebecca of The Crafted Sparrow
5. Andie of Maybe I Will
6. Melissa of Hollyhocks & Honeybees
7. Candice of She's Crafty 
8. Kaylnn of Among the Young

Thursday, July 11, 2013

No sew Capes { Rachel from R&R Workshop}


Hi, Free Time Frolic readers!  I'm Rachel from R & R Workshop and I'm excited to be here today! I've been wanting to make my son a cape for a couple years now. I bought some awesome superhero fabric recently and then realized his sister would probably love a cape as well. These were so simple and No-Sew! A super, easy project and it took no time at all. A Perfect gift idea for birthdays or Christmas!


You will need: 

//fabric: I used felt on one side, 
cotton on the other.
//glue gun
//scissors
//velcro
//ribbon
//pompoms or anything you want to use
to embellish the cape.

Steps:

Step 1. Measure your child to know how long and wide you need the cape to be. Cut out both fabric pieces.
I didnt mind having my edges a little frayed on my fabric, but you can sew yours if you choose to.

Step 2. Place ribbon in-between the fabric, at the top of the cape.. Glue in place.

Step 3. Glue pieces together. I started at the top and went across like pictured above. Smooth down as you go so fabric will not bunch. I did a row at a time and then went back around the edges to make sure they were glued in place.

Step 4. Determine how long you need your ribbon and then glue your velcro onto the ends of your ribbon. I didn't get a picture doing this, but I'm sure you get the idea :) I chose velcro instead of tying around there neck since its a little safer.


5. Decorate the cape if you choose.  For E's, I didn't add anything to decorate since the fabric is so busy. For A's, I added pompoms on the top and at the bottom.  I bought them by the yard for a dollar or so. I loved the fun they add to her cape!

They both really loved them and played together all morning :)


For more fun ideas, you can follow R & R Workshop via Facebook, Twitter or Pinterest!
Thanks Rachel!  These are adorable and no sew!  I love them.  Head over to check out all the great ideas Rachel has waiting for you to find!

Wednesday, July 10, 2013

Princess Bead Necklaces {Steph from Crafting in the Rain}


Today's link is a favorite of mine. Stephanie or at Crafting in the Rain had this amazing idea to make simple but adorable princess necklaces from beads and paint. Genius! Head over and check out how simple and easy this tutorial is.  Your Little Princess will love these necklaces Christmas morning!

Monday, July 8, 2013

Goldfish Cheese Puffs {Snack Mix}

With summer in full swing, my sons has a few camping trips coming up.  I saw these new Goldfish Puffs at Target and decided to give them a try.  My Son is just about to turn 12, so regular goldfish are good but he is getting older and his taste are changing.  These new Goldfish puffs are right up a teenagers alley.  I decided to turn these Yummy Goldfish Puffs into a fantastic trail mix for all the boys to eat around the campfire.  
Goldfish Puffs

Wednesday, July 3, 2013

Cherry Limeade Concentrate {Recipe}


So after posting about my Strawberry Lemonade Concentrate I decide it was time to try my hand at Cherry Limeade.  I loved cherry limeade as a kid and I love myself a good Lime Rickie.  So I bought a lot of Cherries and Lime Juice and busted out a few bottles!
 
Can you see all that yummy pulp?  It's the best part for me!
Want to make a yummy batch for yourself?  Check out how I made mine!
Related Posts Plugin for WordPress, Blogger...