Web Toolbar by Wibiya Free Time Frolics

Monday, September 19, 2011

Raspberry Yumminess!


I love Fruit! To bad I am allergic to most.  Darn enzymes.   There are a few I can eat one of those is Raspberries.  I love them.  Fresh or Bottled (YES, I bottle raspberries They are so good in the cold winter. They remind me of a warm summer day) 
This little dish is wonderful for a party, Sunday dinner or just plain great as a fruit dip.
I served this at a family dinner and It was devoured with in minutes.  I even doubled the recipe. 
My little Miss calls this her Raspeberrry Yumminess.  I think she ate half of this bowl. 


Here is what you need:
1 large pkg vanilla pudding
1 8z. Cool Whip
16 oz. vanilla yogurt
16 oz. plain yogurt
16 oz. Raspberries

Pull frozen raspberries and let thaw while you mix other ingredients.
Whip together yogurt and pudding until pudding is mixed.
Add Cool Whip and mix well.
Take a few whole berries out of the package and save for later. Fold in raspberries. Place your extra raspberries on top for a pretty finish.

If you have any left for a later date it may separate a little. Just whip it back up.


Linking up too:

Crystal and Co. 

Thursday, September 15, 2011

Angry Birds

My boys love Angry Birds.  I thought I would make something fun for them for Christmas.  Then I was asked to do a local Bazaar.  I thought they would make a great gift for a cute little guy or gal.  So I decided to get a jump on it.  Here is my take on Angry birds the bean bag toss.


The birds are all 2 dimensional and the piggies are 3 dimensional. 
Step 1: First I ironed Pellon to one side of the felt.
2: I cut the birdies from the templates below.  And stitched around the edges. Leaving a small hole for the poly fill pellets. 
3: Then put them back through the machine to close them. 
4: I then cut out the eyes, beaks and brows by hand. 
5:Then glued eyes, beaks and brows with my trusty glue gun. 

The piggies were a little more work.  I wanted them to be able to sit on the blocks.  I sewed 3 small circles together so that they would have a bottom gusset to sit on.  Then hand stitched the eyes, nose and mouth onto the fronts. I think next tiem I am going to make the piggies out of wooden doll heads. Paint them green and free hand the eyes and mouths. 
Update for Piggies


Add a set of block and some special little guy or gal will be busy all afternoon building and tossing birds. 

I thought this would be a great birthday or Christmas gift!

***Parental Warning***
This tutorial if made may cause your children to act peculiar.
Laughing, Giggling and using there Creativity may occur.  And may happen for long lengths of time.
Your TV, Video games and Computer will be grateful for the break.

Its time for Crafting with the Stars at Sew Dang Cute.   

Check out this tutorial and others like it for the competition.


Linking up too:

Tuesday, September 13, 2011

Better than Water Balloons

Better than Water Balloons
I found these on Pintrest and thought they were a fantastic idea.  They cost a little to get started but once they are made just add water and reuse as much as you want. 


Supplies needed:
Large sponges
Reuseable yet disposable wiping cloths
Mop with absorbant strips
Plastic cable ties
non slip cupboard liner


Cut your sponge, wiping cloth and liner into 1-1 1/2 in strips.
Cut strips off mop like above.


Next layer your strips.  I used 2 of each and made a little sandwich.
Wrap a cable tie around the center or your sandwich and pull tight. 
Clip the cable tie as short as possible.
You are ready for water fun.
Your kids will love these. 
I thought these woudl be fun to color code so you could play on teams. Give them each a bucket and some water balls and let them go at it.


Wednesday, September 7, 2011

DIY Baby Leg Warmers

We we live in good old Idaho.  We have maybe 3 months of summer and 9 long months of winter.  But even in the summer the mornings are cool and the afternoons hot.  It's hard dressing baby for the weather.  Some mornings this big guy needs a little extra.  I love baby legs but they are not always easy to find.  I have looked and can't find a store.  So here is a little DIY for those on a budget, can't find what you want or just plain old cheap.  I fall in to the all three category.


Start off with a pair of ladies knee socks. I got mine at Target for $2 each. Fall is the best time to find these. they may call them boot socks or knee socks. 


Next cut off your tags and unfold. You will next cut the socks just above the heel. Before the curve.
Then take the foot of the sock. cut the center section out. (The straight part of the foot.) Cutting off the toe and the heel.
When done you should have 4 pieces. You can now throw away the heel and toe. 


Next Take the short piece of the sock. (The part you cut form the foot) and fold in half. Take the folded piece and put it around the long piece with raw edges together. 
Stitch with a long stitch around the raw edges.  Stitching all three layers together.  I like to stretch mine as I sew.  It gives them a little more stretch for Chubby legs. 


All finished.  Quick and easy.  My little guy has been sporting these this summer.  With crawling in the works I have one more reason to make a few more. 

Thanks for visiting!  Let me know what you think.
I love to read your comments.


Linking up too:
I heart naptime

Saturday, July 30, 2011

Coconut Oatmeal Cookies

I love Cookies.  All kinds.  These are one of my favorites.  One of my Aunties makes these each time we have a gathering.  I could eat all of them. Here is the yummy recipe.


1 Cup White Sugar
1 Cup Brown Sugar
1 Cup Margarine
1 tsp Vanilla
Cream together
3 Eggs
Mix withe sugar mixture
2 tsp. Baking Powder
2 tsp. Soda
1 tsp. Salt
2 1/2 Cup Flour
Sift together and mix with above.
2 Cups Rolled oats *
2 Cups Unsweetened Coconut **
*For your rolled oats I like to use all natural ones I get in bulk at Fred Meyers or Winco in the bulk section. When I don't have those I use regular oats but I blend them in my blender for about 15 seconds to grind them up a bit.  I just like the texture better.
**Unsweetened Unsulfered Coconut is found in the bulk bins at Fred Meyers or Winco. Red mill makes some in a small bag. Usually in the Health section.  You can use Sweetened but you will  need to add an additional 1/2 teaspoon of salt.
Mix all ingrediants together.  Drop by spoonfuls onto a GREASED cookie sheet.
Bake  at 350* for 12-15 min or 375* for 9-12 min
Let them cool just a bit (they are better cool) Enjoy!


Tuesday, July 26, 2011

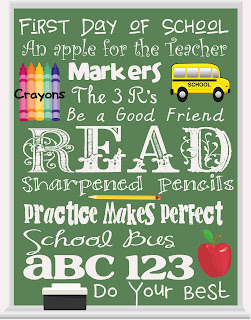
Back to School Printable

Here in Idaho we still have a few weeks till school starts.  But back home in Utah kiddos are heading back today,  Here is a cute little printable to get you back into the swing! Printable size is 11x14.  Just right click, save to your computer, then print at your favorite printer!  Have a Happy Day!

Please right click and save to your computer.  Then print wherever you like!


PLEASE follow the following rules for Free Time Frolics printables:
  • I would love for you to become a follower of Free Time Frolics on Facebook. More Free Printables are coming. You don't want to miss out.
  • Free Time Frolics printables are for PERSONAL USE only. You may not re-sell, re-distribute, or claim them as your own.
  • If posting on the internet, you MUST post a link back to the original post or this page.
  • Freebie printables are offered "as is" unless otherwise noted.
  • Pin, share, use in your home or as a gift. Enjoy.
Related Posts Plugin for WordPress, Blogger...